Tag: safety features

Best In-Ground Trampolines for Safe Backyard Fun

In-Ground Trampolines

In Las Vegas, properly installed in-ground trampolines cut fall risk, handle Southern Nevada heat when spec’d with UV-resistant mats, and usually require standard excavation permits—expect local installs from roughly $2,500–$6,000 depending on size and retaining walls. Request a free 3D design rendering and financing quote.

Looking for a safer way to bring active play to your yard—without the worry of high ledges or ladders? This guide to in-ground trampolines explains how lowering the bounce into the ground improves trampoline safety and makes jumping easier and more inviting for kids and the whole family. We focus on practical choices for Las Vegas, Henderson, and Summerlin homeowners—considering desert soils, extreme summer heat, and SNWA landscaping constraints.

We review top in-ground trampolines that balance durable frames, high-performance mats, and straightforward installation—so your backyard experience stays fun, secure, and long-lasting. Our recommendations reflect national hands-on installation experience; locally, homeowners benefit from site-specific 3D design renderings we provide to confirm fit, shade, and sun exposure in Southern Nevada yards.

We offer a curated selection of quality products with clear reviews and support. Free shipping is available on many kits (confirm regional limits on the product page), and our customer service team can answer questions about frames, mats, installation, and warranty. For local service area details see our map: service area map. If a page blocked extension prevents viewing product pages, try disabling browser extensions (see our troubleshooting help page) or open the product sheet directly to continue. For expert advice, financing options, or to request a free 3D design rendering and site evaluation, contact our team at (832) 981-6336 or visit our in-ground trampoline services page: In-Ground Trampolines Service.

Key Takeaways

  • Lowering a trampoline into the ground reduces fall risk and improves yard aesthetics while keeping sightlines open for supervision—important for family safety in Nevada yards.
  • Quality frames, vented mats, and proper drainage are key to long-term performance and trampoline safety in high-heat climates.
  • Professional installation or DIY kits are both viable—pick the option that fits your budget, timeline, and comfort level; DIY may affect warranty if instructions aren’t followed.
  • Free shipping options simplify delivery—confirm regional terms on the product page before purchase.
  • Read customer reviews and product specs to match shape and size to your yard and family’s play style; request a 3D design to visualize placement.
  • If the site shows a page blocked notice or a blocked extension message, try disabling extensions or open the product sheet directly to continue (detailed troubleshooting on our help page).
  • Learn more about ground versus above-ground options at above ground vs in-ground trampoline and see our service offerings: In-Ground Trampolines Service.

Elevating Backyard Fun with In-Ground Trampolines

A serene backyard scene featuring a beautifully designed in-ground trampoline surrounded by lush green grass and vibrant flower beds. In the foreground, the trampoline's smooth, black mat is flush with the ground, offering a seamless look. In the middle ground, a family of four, dressed in modest casual clothing, joyfully bounce together on the trampoline, expressing happiness and excitement. The background showcases a clear blue sky with fluffy white clouds, warm sunlight casting soft shadows, illuminating the scene with a cheerful ambiance. Capture this moment from a slightly elevated angle to provide a comprehensive view of the trampoline and its joyful users, emphasizing the safety and fun that in-ground trampolines bring to backyard activities.

A properly sunk in-ground trampoline transforms a cluttered yard into a sleek, safe play area that invites more frequent use. By burying the frame, a ground trampoline eliminates the raised edge and creates a flush surface that blends with lawn and garden—improving sightlines for supervision and boosting overall backyard appeal.

Many families report that easier entry encourages kids to play outside more often. While some yards and local codes still recommend enclosure nets, in-ground trampolines can reduce the need for tall nets in smaller yards when installed with the proper safety systems and spacing. Always check relevant safety standards (ASTM, CPSC) and local permitting before you install.

Local note for Las Vegas, Henderson, and Summerlin: Southern Nevada yards often have decomposed granite, compacted desert soils, and SNWA landscaping rules that affect turf restoration and irrigation. Before excavation, call 811 to mark utilities and plan for irrigation line rerouting; factor in soil stabilization or a small retaining wall if your site slope or soil compaction requires it. We include a free 3D design rendering for local projects so you can visualize placement, shade at different times, and exact clearance.

Design benefits at a glance — Flush Design: improved aesthetics and supervision; Easy Access: more frequent play for kids and family; Low Profile: better sightlines and lower center-of-gravity risk. Note: flush installations require proper drainage; some sites will need a retaining wall or soil stabilization.

FeatureBenefitConsideration
Flush Design Improved yard aesthetics Requires proper drainage
Easy Access More frequent use by kids and family May need retaining wall
Low Profile Better sightlines and safety Professional or DIY installation options

Site assessment — quick process:

  • 1) Measure yard footprint and clearance requirements (allow 3–6 ft around the trampoline).
  • 2) Call 811 to mark utilities and note irrigation lines.
  • 3) Check slope and drainage; plan retaining wall or soil stabilization if slope exceeds recommended limits.
  • 4) Request a free 3D design rendering to confirm sun/shade, fit, and HOA compliance.

For help with sizing or in-ground trampoline installation, visit our guide on in-ground trampoline installation or contact customer service to discuss the best fit for your backyard and bounce needs. To view our local service area, see the map: service area map. If you encounter a page blocked extension while browsing specs or reviews, try disabling browser extensions or open the product sheet directly to continue. Learn more about our offerings and request a 3D rendering on our in-ground trampoline service page.

Advanced Design and Airflow Technology

A modern, in-ground trampoline featuring innovative airflow technology, designed for safety and performance, situated in a lush backyard. In the foreground, the trampoline mat showcases a unique mesh design that enhances airflow, with vibrant colors reflecting sunlight. In the middle ground, an inviting, well-maintained garden surrounds the trampoline, including colorful flowers and green shrubs. Soft, golden sunlight filters through leafy trees, creating a warm and joyful atmosphere. The background reveals a clear blue sky dotted with fluffy white clouds. The angle captures the trampoline from a low perspective to emphasize its sleek shape and advanced features, evoking a sense of excitement and fun. The overall scene is lively and cheerful, perfect for showcasing the essence of modern backyard enjoyment.

Modern airflow systems make each jump feel higher, cooler, and more controlled. Vented pad designs channel air away from the mat so a jumper meets less resistance on ascent and descent—translating to a smoother, more enjoyable bounce. In Southern Nevada, venting also helps keep mat surface temperatures lower during hot afternoons.

Vented safety pads reduce wind drag and help keep the mat surface cooler on hot days, improving comfort for kids and adults. Independent tests show measurable differences in peak bounce height and mat temperature between vented and non-vented mats; check the product datasheet on each model page for details and lab methods. When comparing products, prioritize UV-resistant mat coatings and corrosion-resistant frame finishes built for desert sun and heat.

Frames are engineered for long-term durability with reinforced joints and corrosion-resistant finishes. A stout frame is fundamental to consistent performance and reliable trampoline safety over years of active use—choose a model with a documented warranty and clear material specs. Ask for local references or reviews to confirm long-term durability in high-UV climates.

  • Vented vs non-vented mats: Vented — lower air resistance, cooler mat, smoother bounce. Non-vented — slightly firmer feel, marginally less maintenance. Choose vented mats for hot climates like Las Vegas.
  • Look for UV-rated materials and corrosion-resistant frames for longer life in Nevada sun.
  • Ask about warranty specifics and whether UV damage or improper installation affects coverage.
  • The 15ft x 10ft Double Vented North model (example) features advanced airflow technology for a superior jump—see the product page for full technical datasheet and warranty details. Prices vary by region; ask for a local estimate and financing options to spread installation cost.
  • Choosing an in-ground trampoline with vented pads delivers a smoother, higher bounce while preserving safety and mat longevity.
  • Compare mat materials and venting specs in product descriptions and reviews to match performance goals and quality expectations.
FeatureBenefitWhy it matters
Vented Safety Pads Lower air resistance Higher, more controlled jump and cooler mat
Airflow Technology Consistent performance Improved durability and user experience
Reinforced Frame Stable foundation Supports active play and long service life

Need help comparing models for Las Vegas, Henderson, or Summerlin yards? Request a free 3D design rendering to see sun exposure and mat temperature impact at different times of day, and get a localized price and warranty summary on our in-ground trampoline service page: In-Ground Trampolines Service. For technical datasheets or laboratory test results referenced on model pages, open the product sheet or contact customer service; if a page blocked extension prevents viewing, try disabling extensions or open the datasheet directly.

Professional Installation and DIY Setup Options

An inviting backyard scene featuring several in-ground trampolines nestled among lush green grass. In the foreground, a professionally installed large square trampoline with safety nets, surrounded by a variety of colorful landscaping plants. In the middle ground, a DIY setup with tools and materials like brackets and stakes displayed, hinting at the installation process. In the background, a clear blue sky radiates warm sunlight, casting soft shadows and creating a cheerful atmosphere. Capture a sense of excitement and safety, ideal for family fun. Use a slightly elevated angle to provide a comprehensive view of the trampolines, highlighting both the professional and DIY aspects, with vibrant colors that create a playful yet serene mood.

Whether you hire professionals or tackle the build yourself, correct installation is essential to long-term safety and performance. Our certified installation team can handle site prep, drainage, and retaining walls to ensure a level, durable setup—while DIY kits give handy owners full control and cost savings. For homeowners in Las Vegas, Henderson, and Summerlin we provide local site visits and free 3D design renderings to confirm fit, sun exposure, and estimates.

Retaining Wall Requirements

A solid retaining wall prevents soil from shifting and protects the frame. Common, durable materials include AZEK panels or pressure-treated 2×4 wood; consult local codes and the product warranty before finalizing materials. In steeper yards, a retaining wall also preserves drainage and prevents soil collapse around the inground trampoline.

  • Professional installation: recommended for complex sites, steep slopes, or where permits are required. Professional service includes site assessment, leveling, permit coordination, and code compliance checks. Contact us for a local estimate and financing options.
  • DIY kits: include step-by-step instructions for building a retaining wall, setting the frame, and installing the mat and safety pads. Follow instructions exactly and register your product to preserve warranty coverage.
  • Site-prep checklist: mark underground utilities (call 811), check slope and drainage, confirm soil type (desert soils may need compaction/stabilization), and plan for irrigation line rerouting to comply with SNWA rules.
  • We offer free shipping on many kits (see product pages for regional terms). Contact customer service to schedule a site evaluation or ask about warranty specifics.
  • If a page blocked extension prevents you from viewing manuals or reviews, try disabling browser extensions or open the product sheet directly.
Option Who it’s forbenefit Key benefit
Professional Install Homeowners who prefer hands-off Perfect leveling, faster completion, backed service
DIY Kit Handy owners and contractors Lower cost, full control, clear instructions for wall and frame
Materials AZEK or treated 2×4 wood Prevents soil drift, protects the frame

Installation process — numbered steps:

  • 1) Site survey and measurements (we recommend scheduling a local visit).
  • 2) Free 3D design rendering to confirm placement, shade, and clearance.
  • 3) Permit check and 811 utility marking.
  • 4) Excavation and retaining wall or soil stabilization as needed.
  • 5) Frame set, mat and pad installation, anchors and drainage setup.
  • 6) Final inspection, warranty registration, and homeowner walkthrough.

For step-by-step guidance on integrating these systems, visit our guide to integrate in-ground trampolines. To discuss installation, pricing, or warranty details, or to request financing and a free 3D design rendering and written estimate, contact our team—we schedule site visits across Las Vegas, Henderson, and Summerlin. See our in-ground trampoline service page for details and local project examples: In-Ground Trampolines Service.

Essential Safety Features for Worry-Free Jumping

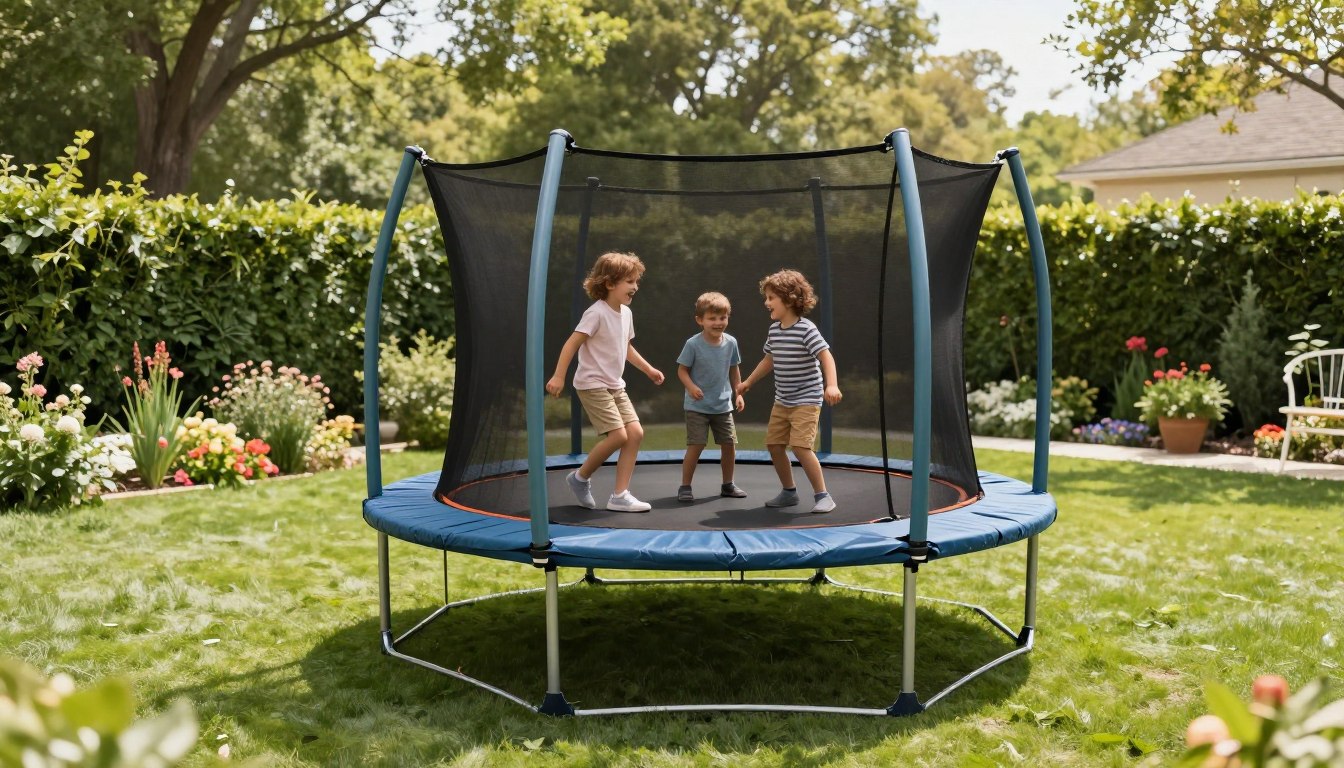
A beautifully designed backyard featuring an in-ground trampoline, surrounded by lush green grass and colorful flowers. In the foreground, a family of four dressed in modest casual clothing joyfully jumps on the trampoline, demonstrating safe jumping techniques, with smiles on their faces. In the middle ground, emphasize essential safety features such as a protective netting around the trampoline, soft padding covering the edges, and nearby safety mats. The background showcases a well-maintained garden with trees and a blue sky, creating a cheerful, sunny atmosphere. Use soft, natural lighting to enhance the welcoming feeling, captured from a low angle to emphasize the trampoline and family activity. The overall mood is fun, carefree, and focused on safety, perfect for illustrating essential trampoline safety features.

Good safety design turns backyard jumping into a worry-free family activity. The right combination of enclosure nets, protective padding, anchor kits, and routine checks keeps jumpers on the mat and away from hazards—so kids and adults can enjoy consistent, safe fun in your backyard.

Follow standards and guidance: look for products tested to relevant safety standards (ASTM, CPSC where applicable) and check the product datasheet for certification details. Using certified safety equipment and following installation instructions is essential to maintaining trampoline safety and preserving warranty coverage.

Safety Enclosures

Choose a high-quality enclosure with UV-resistant mesh, secure attachment points, and a snug fit to avoid gaps. Properly installed nets reduce trampoline safety risks by preventing falls off the mat; consult the product fit guide to ensure compatibility with your in-ground trampoline model.

Protective Padding

Protective pads cover the frame and springs and cushion accidental landings. Look for durable, weather-resistant padding with sufficient thickness and secure fastenings; inspect pads seasonally and replace them if seams or foam break down to maintain both safety and mat longevity—extreme Nevada sun accelerates wear, so prioritize UV-rated padding.

Anchor Kits

Anchor kits secure the trampoline to the ground so wind and heavy play won’t shift the unit. Use anchors rated for your specific model and soil type—improper anchoring can increase risk during storms and may affect warranty coverage. For desert soils, ask about anchors designed for loose or compacted ground.

  • Do: anchor the trampoline, inspect pads and nets every 3 months, and follow manufacturer instructions for weight limits and single-user recommendations.
  • Don’t: allow multiple unsupervised jumpers if the product warns against it, and don’t skip recommended maintenance—warranty terms often require proper use and upkeep.
  • Tip: use shade sails or schedule heavy play for mornings/evenings in Las Vegas/Henderson/Summerlin to reduce mat temperature and UV exposure.

Safety checklist — basic maintenance schedule:

  • Monthly: quick visual check of mat, pads, and enclosure; tighten attachments as needed.
  • Quarterly: inspect padding seams, net integrity, and anchor points; replace worn pads.
  • Annual: professional inspection for frame alignment, drainage, and warranty documentation—schedule through our service team.
Feature Benefit Why it matters
Enclosure Net Prevents falls Reduces injuries and improves supervision
Protective Pad Covers frame & springs Absorbs impact, protects mat edges
Anchor Kit Secures to ground Prevents movement in wind or rough play

Real-world note: installers commonly see edge wear accelerate when padding isn’t replaced—regular inspection prevents small issues from becoming safety problems. For replacement parts, recommended inspection intervals, and detailed safety specs, check the product page and warranty documentation. Schedule an annual safety inspection or order replacement pads and anchor kits via our in-ground trampoline service page: In-Ground Trampolines Service. If a blocked extension message prevents you from viewing specs or manuals, try disabling browser extensions or open the product sheet directly to continue.

Choosing the Right Shape and Size for Your Landscape

Visualize a serene suburban backyard featuring an in-ground trampoline nestled seamlessly into the lush green grass. The trampoline is circular and surrounded by vibrant flower beds with colorful blooms, creating a welcoming atmosphere. In the foreground, a family in modest casual clothing interacts joyfully, with two children preparing to bounce on the trampoline, while an adult watches attentively nearby. The middle ground highlights the trampoline's safety enclosure, emphasizing its secure design. In the background, a clear blue sky is illuminated by warm sunlight, casting gentle shadows across the scene. The angle is slightly elevated, capturing the entire layout of the backyard as a perfect spot for safe, enjoyable outdoor fun. The mood is cheerful and inviting, embodying the essence of family-friendly leisure.

Match trampoline layout to your lawn space to maximize safety and play value. Begin with accurate measurements and a quick site survey—note slopes, trees, drainage, and underground utilities before you pick a model. In Southern Nevada, check for decomposed granite, compacted desert soils, and nearby irrigation that may affect excavation depth and turf restoration.

Measure twice: allow at least 3–6 feet of clear space around the trampoline perimeter (more for high-traffic yards). Recommended in-ground depth varies by model and soil—consult the product installation guide for exact excavation depth. Larger rectangular or oval models give more usable surface for groups; round trampolines suit tighter yards and family play.

Pick a shape to match movement patterns and performance goals: rectangular mats offer directional bounce favored by serious jumpers and training, round models provide even bounce distribution ideal for family play, and large oval/oval-rect options provide room for groups and mixed activities. Consider artificial turf or low-water groundcover to comply with SNWA landscaping guidance after installation.

  • Quick sizing checklist: site length & width, radius of clearance (3–6 ft), distance to trees/structures, soil type, and drainage plan.
  • How we size: site visit → free 3D design rendering to confirm sun/shade and fit → final selection and written estimate (financing options available).
  • How to read reviews: look for consistent comments about mat feel, frame durability, and long-term performance rather than single, isolated complaints.
  • If a page blocked extension prevents viewing specs or sizing guides, try disabling browser extensions or open the product sheet directly to continue.
Shape Best for Key benefit
Rectangular Training and higher bounce Directional performance
Round Family play Even bounce, safer center
Large Oval Groups & mixed use Room to run and jump

Our selection of in-ground trampolines balances mat performance, frame durability, and overall product quality so every backyard finds the right ground trampoline fit. For a free sizing consultation, local pricing, or to schedule a site visit in Las Vegas, Henderson, or Summerlin, visit our in-ground trampoline service page: In-Ground Trampolines Service or check our service area map.


Tags: , , , ,

Poolside Landscaping Design: 12 Safety and Style Solutions

Transform your pool area into a safe and stylish refuge by integrating smart design elements that work together. You’ll want to start with code-compliant fencing, featuring self-closing gates and non-climbable surfaces, then layer in slip-resistant decking materials with a minimum 0.42 DCOF rating. Add strategic LED lighting and zero-entry features for enhanced safety, while incorporating low-maintenance landscaping to increase property value. These essential design solutions mark just the beginning of your pool area’s potential.

Smart Fencing Solutions That Enhance Property Appeal

smart fencing for poolside appeal

When strategically incorporated into poolside landscaping, smart fencing solutions serve as both protective barriers and value-adding design elements. You’ll find cost effective options across materials ranging from aluminum to wood, with professional installation yielding the highest returns on your investment. Privacy and seclusion make your pool area a peaceful retreat from nosy neighbors and passersby.

Consider durability when selecting materials, aluminum and wrought iron fencing deliver long-term value at $20-35 per linear foot, while requiring minimal maintenance. Pool code regulations must be carefully reviewed with local authorities before installation. These modern options blend seamlessly with your outdoor aesthetics while meeting safety requirements. For premium appeal, tempered glass fencing creates an unobstructed view of your pool area while maintaining security. The proper incorporation of landscaping elements with fencing can boost your home’s resale value by up to 20% according to industry experts.

You’re not just adding a safety feature – you’re potentially increasing your property’s value by 1-10% while creating defined spaces that amplify both functionality and visual appeal.

Child-Safe Pool Area Design Essentials

When designing a child-safe pool area, you’ll need to integrate three critical safety elements: a secure fence system with self-closing gates, non-slip surfaces throughout the deck space, and child-resistant entry points. Your fence design should incorporate vertical bars spaced no more than 4 inches apart, reach a minimum height of 4 feet, and feature sturdy self-latching mechanisms positioned out of children’s reach. To complete the safety trifecta, install textured, slip-resistant decking materials like stamped concrete or rubberized surfaces that provide essential traction while reducing impact injuries from potential falls. Consider installing gate alarm systems to provide an extra layer of protection by alerting you whenever someone enters the pool area. Installing LED pool lights around the perimeter enhances visibility and helps prevent accidents during evening hours. A zero-entry design can provide safer access for young children while they develop their swimming skills and confidence in the water.

Secure Fence Design Elements

A properly designed pool fence serves as the primary barrier between children and potential drowning hazards. Your code compliant fence construction must reach a minimum height of 48 inches, with self-closing gates that open outward and feature self-latching mechanisms positioned at least 54 inches above ground. Regular maintenance inspections are essential to ensure ongoing safety and compliance with regulations. Removing potential climbing objects from the fence perimeter helps prevent unauthorized pool access.

Following professional installation guidelines, guarantee vertical members are spaced no more than 1¾ inches apart, preventing children from squeezing through. If you’re using horizontal rails less than 45 inches apart, position them on the pool side to deter climbing. Choose durable materials like wrought iron or glass panels, maintaining a smooth surface without footholds. For chain link options, limit mesh size to 1¼ inch square. Remember, no opening should allow passage of a 4-inch sphere, including decorative elements and cutouts.

Non-Slip Surface Solutions

Safety underfoot demands careful selection of slip-resistant surfaces around your pool area. You’ll need materials that meet or exceed the minimum 0.42 DCOF rating, with outdoor areas requiring up to 0.55. Choose Class 3-certified surfaces for maximum protection, especially on slopes. Soft rubber testing provides more accurate slip resistance measurements for barefoot areas compared to hard rubber testing methods. For optimal slip resistance, consider materials like Hisbalit mosaic tiles with B3 anti-slip finish that provide maximum protection even on gradients above 45%.

Surface Type Properties Maintenance Safety Rating
Textured Tile Non-porous, grip-augmented Regular cleaning Class 3
Natural Stone Porous, water-absorbing Sealing required Varies
Treated Concrete Customizable texture Annual coating High
Anti-slip Coatings Chemical fortification Periodic reapplication Certified

Don’t overlook maintenance; regular cleaning and skid-resistant finishes are essential. Install proper drainage to prevent water pooling, and consider contrasting colors to mark edges. For existing surfaces, chemical treatments can upgrade slip resistance without compromising aesthetics. Ceramic tiles with lapatto finish provide exceptional slip resistance in both wet and dry conditions, making them an ideal choice for pool surroundings.

Child-Proof Gate Systems

Pool security hinges on properly designed child-proof gate systems that form your initial line of defense against accidents. Your gate must stand at least 48 inches tall and feature self-latching gate features that automatically secure the entrance upon closing. Install child-proof lock mechanisms at a minimum height of 54 inches, or position them on the pool side with the release point three inches below the gate’s top edge. Vertical spacing between fence members must maintain maximum 4 inches to prevent children from squeezing through gaps.

Proper implementation of these safety measures is crucial, as 330 children under age five tragically drown in residential pools each year. Ensure your gate swings outward from the pool area and incorporates non-climbable construction without handholds. You’ll need posts and rails capable of withstanding 150-pound lateral loads, while the fence fabric must resist 50-pound concentrated forces. When your home’s wall serves as part of the barrier, equip all access doors with UL 2017-compliant audible alarms and self-closing mechanisms.

Non-Slip Surface Options for Style and Safety

When planning your pool area’s topography, you’ll find textured stone pavers offer superior slip resistance while maintaining an upscale aesthetic through differing finishes and patterns. Artificial turf sections strategically placed around your pool create safe, non-slip zones that stay cool underfoot and eliminate the hazards of wet concrete or stone surfaces. Your deck material choices, from composite boards to rubber pavers, can incorporate slip-resistant technologies while complementing your entire scene design through customizable colors and textures. Stamped concrete designs provide an elegant and cost-effective solution for creating slip-resistant surfaces around your pool. For enhanced durability and peace of mind, applying water-based acrylic sealers provides chemical and UV resistance while maintaining the deck’s original appearance.

Textured Stone Paver Solutions

Creating a slip-resistant poolside environment demands thoughtful consideration of textured stone paver solutions that balance safety with aesthetic appeal. You’ll find natural stone and concrete pavers offer superior grip characteristics while accommodating custom paver pattern designs like herringbone or basketweave layouts.

The porous paver installation benefits extend beyond safety, as these materials effectively manage water drainage and maintain cooler surface temperatures for barefoot comfort. You can choose from travertine, limestone, or concrete options that resist chlorine, UV exposure, and weather elements while providing long-term durability. These pavers’ natural variations in tone and texture create sophisticated outdoor spaces that complement your pool’s architecture. When selecting materials, you’ll appreciate how textured stone pavers combine slip resistance with design versatility, ensuring your poolside area remains both safe and stylish.

Artificial Turf Safety Benefits

Beyond traditional stone solutions, artificial turf has emerged as a sophisticated non-slip surface option that combines safety with modern poolside aesthetics. You’ll benefit from amplified traction benefits year-round, while creating an allergen free environment that eliminates chemical exposure from fertilizers and pesticides.

Safety Feature Benefit Application
Non-Slip Texture Superior grip in wet conditions High-traffic areas
UV-Resistant Coating Temperature control Full sun exposure
Drainage Backing Quick water dispersal Pool surrounds

The turf’s durability withstands heavy foot traffic while maintaining its structural integrity for up to 20 years. You’ll appreciate its consistent appearance and comfort underfoot, whether you’re lounging poolside or walking barefoot. It’s particularly effective at reducing slip risks for children and older adults, while its hypoallergenic properties create a safer recreational environment for all users.

Slip-Resistant Deck Materials

Selecting the right slip-resistant deck material forms the foundation of a safe and stylish pool environment. Your options range from textured rubber decking, which offers superior grip even when wet, to slip-resistant concrete options that can be customized through stamping and texturing techniques.

For maximum safety, consider rubber decking at $9-15 per square foot, which provides excellent traction and cushioning for swimmers. If you’re seeking a balance of durability and design flexibility, textured concrete surfaces offer reliable slip resistance at $6-15+ per square foot. Natural stone and pavers deliver upscale aesthetics with built-in grip, while slip-resistant tiles allow for sophisticated pattern work. Each material requires different maintenance levels, so you’ll want to weigh long-term care requirements against your initial investment and safety needs.

Strategic Lighting for Evening Pool Enjoyment

While daytime swimming offers natural illumination, thoughtful pool lighting transforms your aquatic space into an enchanting evening retreat. Install underwater lights every 8 feet along pool walls, positioning them 18-24 inches below the waterline in deep ends and 9-12 inches in shallow areas. For rectangular pools parallel to your house, mount fixtures on the wall nearest the structure to prevent glare into primary viewing areas.

Create versatile lighting schemes by combining LED strips, solar-powered fixtures, and programmable lighting controls. You’ll improve both safety and aesthetics by illuminating deck boundaries, steps, and entry points while highlighting waterfalls or architectural features. Position lights at 60-degree angles in curved pools for consistent coverage. Incorporate downward-casting fixtures to minimize shadows and optimize visibility during nighttime use.

Low-Maintenance Plant Selection Guide

low maintenance drought resistant year round minimal upkeep

Choosing native drought-resistant plants like sage and ornamental grasses will minimize your poolside maintenance while providing year-round visual interest. You’ll find reliable performers in container-friendly options such as agave and bamboo palm, which maintain their appeal across seasons without creating debris issues. Ground covers like sedum and society garlic offer practical solutions for bare spaces, thriving in hot conditions while requiring minimal upkeep.

Native Drought-Resistant Favorites

For poolside scenery that demands minimal upkeep, native drought-resistant plants offer an ideal blend of durability and visual appeal. Your native species selection should prioritize structural varieties like agave and red yucca, which provide bold accents while using 30-60% less water than exotic alternatives.

Consider positioning a palo verde tree for filtered shade or showcasing manzanita’s distinctive red bark as focal points. These attractive low-water alternatives do not only minimize pool debris but also support local wildlife and resist regional pests naturally. California buckwheat clusters add long-lasting blooms without messy leaf drop, keeping your pool cleaner.

For excellent results, group succulents near hardscape edges, position shade trees strategically, and use native groundcovers to control erosion while softening your pool’s perimeter lines.

Best Year-Round Performers

Successful poolside landscaping depends on selecting plants that deliver year-round visual impact with minimal maintenance requirements. For ideal year-round aesthetics, consider evergreen foundations like arborvitae and false cypress, which provide consistent privacy screening and structure without dropping debris into your pool.

Layer your design with low-maintenance perennials that offer seasonal foliage interest. Incorporate ornamental grasses like miscanthus or muhly grass for height and movement, while drought-tolerant sedums and coneflowers add pops of color. For warmer climates, heat-loving succulents and agave create striking architectural elements. Complete your poolside sanctuary with croton or bird of paradise for vibrant accents, and consider citronella plants to naturally deter insects while contributing to the comprehensive design scheme.

Poolside Ground Cover Options

When planning your poolside scenery, ground covers serve as essential design elements that can dramatically reduce maintenance while enhancing safety and aesthetics. Consider drought-tolerant options like creeping thyme and Mediterranean herbs that withstand wet weather maintenance challenges while offering year-round aesthetics.

For clean, low-maintenance solutions, choose non-shedding varieties such as mondo grass or Dymondia margaretae. These plants won’t clog filters or create debris around your pool. Select salt-tolerant species like Lippia nodiflora that can handle chlorine spray and occasional flooding. You’ll want to prioritize plants with non-invasive root systems and low-profile growth to protect pool structures and maintain clear sightlines. Remember to opt for wind-resistant covers that can withstand heat reflection from pool decking while providing consistent ground coverage throughout the seasons.

Shade Structure Ideas for UV Protection

customizable adaptable durable protective shade structures

Protecting your family and guests from harmful UV radiation requires thoughtful implementation of poolside shade structures. For effective protection, consider installing retractable canopies or louvered roof systems that adjust throughout the day as sun angles change. These adaptable solutions offer precise control over sunlight exposure and airflow.

When selecting materials, prioritize high-performance architectural fabrics that block up to 99% of UV rays. Today’s commercial-grade customization options combine fabric durability with aesthetic appeal, from waterproof, weather-resistant meshes to warranty-backed materials that resist fading for 10+ years. Choose non-corrosive frames made from aluminum or powder-coated steel to guarantee longevity in pool environments. For permanent solutions, modern pergolas and cabanas offer dedicated shelter while serving as architectural focal points, complete with integrated lighting for extended outdoor enjoyment.

Privacy Landscaping Around Pool Areas

Creating effective pool privacy requires strategic layering of both natural and structural elements to establish secluded outdoor spaces. You’ll want to implement layered visual screening through a combination of fencing, plantings, and decorative structures.

Element Primary Function Installation Tip Maintenance Need
Privacy Fence Base barrier Install automated gate systems Low for vinyl/composite
Dense Hedges Natural screen Plant 3-4′ apart Seasonal pruning
Pergolas Overhead cover Add outdoor curtains Annual inspection
Layered Plants Depth creation Stagger heights Regular trimming

For ideal seclusion, combine tall privacy fences with fast-growing evergreens and flowering shrubs. Add structural elements like pergolas or trellises to create vertical interest while supporting vining plants. Remember to maintain clear sight lines for safety while establishing your private retreat through strategic placement of these screening solutions.

Water-Wise Pool Deck Solutions

Modern pool deck design demands water-conscious solutions that balance aesthetic appeal with environmental responsibility. You’ll augment sustainability by incorporating drought-resistant plants like ornamental grasses and succulents alongside efficient hardscape materials. Composite decking and porcelain pavers offer durability while minimizing maintenance-related water usage.

Implement sustainable irrigation systems through low-flow drip installations and smart controllers that target specific zones. Your water conscious landscaping should include permeable surfaces and proper grading to manage runoff effectively. Consider integrating artificial turf and drought-tolerant ground covers to maintain a lush appearance without excessive irrigation needs. Multi-functional features like built-in planters with moisture-retaining mulch help optimize space while conserving water. These thoughtful design choices will reduce your environmental impact and long-term maintenance costs while creating an inviting poolside environment.

Safe Pool Entry and Exit Features

Beyond water conservation, the safety of your pool’s entry and exit points shapes the core functionality of your poolside design. Incorporating secure deck access points and water hazard indicators guarantees everyone can enjoy your pool safely. From slip-resistant steps to strategically placed handrails, each safety feature contributes to both functionality and aesthetics.

  • Install wide, textured steps with contrasting colors to heighten visibility and reduce slip risks
  • Consider a zero-entry design that provides gradual slope access, perfect for universal accessibility
  • Mount corrosion-resistant stainless steel handrails at key entry points for added stability
  • Integrate underwater and perimeter lighting to illuminate access zones during evening hours

These thoughtful safety elements meet pool code requirements and also create an inviting environment that seamlessly blends security with sophisticated design elements.

Pool Slide Integration With Landscape Design

While pool slides offer exciting recreational value, their successful integration into your terrain, environment, or setting requires careful consideration of placement, materials, and surrounding elements.

Position your slide strategically to maximize accessibility and sightlines while maintaining safety distances from other pool features. Opt for customizable slide profiles that complement your landscape’s natural slopes and incorporate integrated water features like grottos or waterfalls. Select materials that match your pool deck and surroundings, whether it’s natural stone, concrete, or mosaic tile.

Create seamless shifts using strategic plantings of chlorine-resistant greenery and decorative boulders. Improve the design with layered landscaping that softens hardscape edges while maintaining clear sight lines. Consider LED lighting placement to highlight your slide features and guarantee safety during evening use.

Erosion Control Through Smart Planting

Smart erosion control near your pool starts with strategic plant selection and purposeful layering of vegetation. By incorporating native plant recommendations and proven slope stabilization strategies, you’ll create a resilient terrain that protects your poolside environment while enhancing its visual appeal.

  • Deep-rooted perennial grasses provide quick coverage and long-term soil retention
  • Dense groundcovers like junipers and creeping thyme anchor soil while reducing runoff
  • Multi-layered combinations of shrubs and small trees break up the rainfall impact
  • Natural fiber erosion control fabrics support new plantings until roots establish

For maximum effectiveness, pair your plantings with proper water management systems like bioswales or French drains. Consider using jute netting on steeper slopes and apply organic mulch around plants to further protect soil structure and reduce moisture loss.

All-Season Pool Area Maintenance Tips

To maintain a pristine pool environment throughout the year, a systematic approach to maintenance guarantees both safety and longevity of your investment. Your seasonal strategy should adapt to changing conditions while maintaining consistent proper filtration maintenance and chemical balance monitoring.

During summer, increase your testing frequency to weekly checks, ensuring pH levels stay between 7.2 and 7.8. Don’t skip bi-weekly filter cleanings and daily skimming when usage peaks. As autumn approaches, install leaf nets to prevent debris from overwhelming your system. In winter, protect your investment by maintaining water chemistry and using appropriate covers. When spring returns, thoroughly inspect all mechanical components and adjust your maintenance schedule accordingly.

Remember to brush walls weekly and vacuum regularly across all seasons – these fundamental practices prevent algae growth and maintain your pool’s aesthetic appeal.

Frequently Asked Questions

How Far Should Trees Be Planted From the Pool’s Edge?

You’ll want to keep most trees at least 20 feet from your pool’s edge for ideal tree spacing. If you’re planting trees with aggressive root systems like willows or maples, increase this distance to 100 feet. For smaller ornamental trees, you can reduce the spacing to 8 feet, ensuring appropriate planting depth to control root growth. Remember, your tree’s mature size determines its final placement; larger trees need greater distances to prevent root damage.

Can Saltwater Pools Damage Nearby Plants and Landscaping Features?

Yes, your saltwater pool can harm nearby plants and terrain features. The salt accumulation in soil disrupts plant water absorption and nutrient uptake, while saltwater splashes can cause leaf burn. You’ll need to ponder plant salt tolerance when selecting species for poolside landscaping. To minimize damage, install salt-resistant plants, rinse foliage regularly with fresh water, and monitor for signs of saltwater pool corrosion on outdoor fixtures and materials.

What Wildlife Deterrents Work Best Around Pool Areas?

You’ll find the most effective wildlife deterrents combine multiple approaches. Install motion-activated sprinklers to startle animals attempting to access your pool area, and pair them with scent-based repellents like peppermint or lavender sprays around the perimeter. Add a well-secured pool cover and tall fencing for physical barriers. Don’t forget to maintain a clean pool area and trim nearby vegetation to reduce access points for climbing animals.

How Often Should Pool Deck Surfaces Be Resealed or Resurfaced?

You’ll need to reseal your pool deck every 2-5 years and resurface every 5-15 years, depending on your deck’s material and exposure conditions. Establish a regular maintenance schedule that includes professional inspections at least annually to catch early signs of wear. Don’t wait for visible damage; proactive resealing protects against water intrusion and maintains slip resistance, while timely resurfacing prevents structural issues and keeps your deck safe and attractive.

Which Pool Cover Types Work Best With Landscaping Features?

Mesh safety covers offer the most versatile compatibility with your gardening material selection, as they’re lightweight and adapt easily to irregular shapes and multi-level features. For areas with dense foliage, solid covers excel at blocking debris and preventing algae growth. If you’re prioritizing pool cover aesthetic appeal, automatic covers provide the cleanest look and seamlessly integrate with sophisticated hardscaping, though they’ll require more extensive installation planning around existing scenery elements.

Tags: , ,