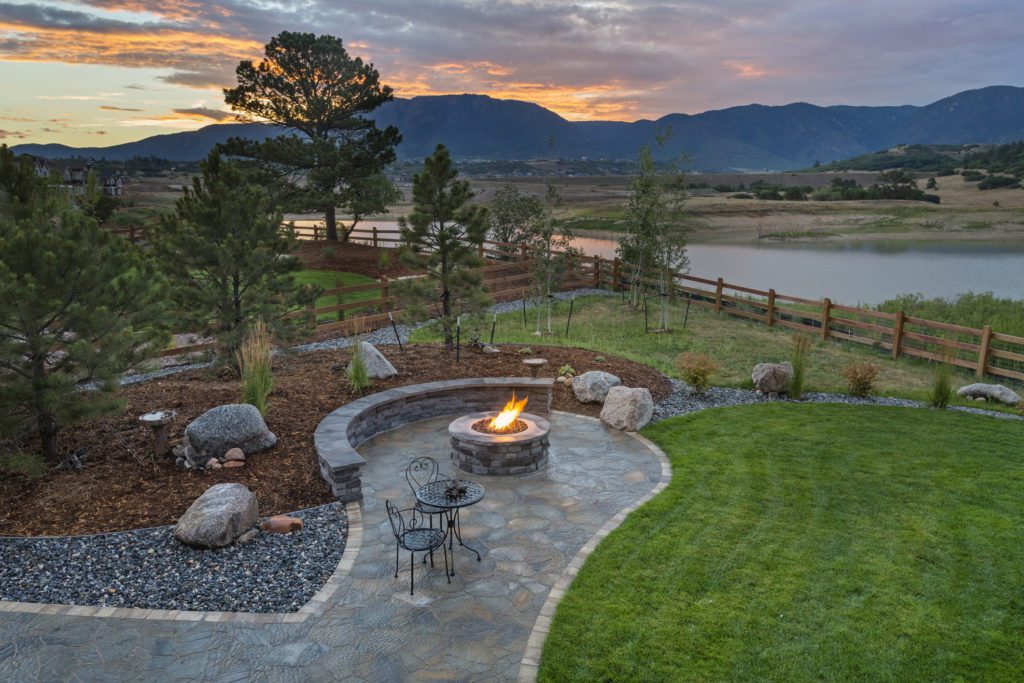
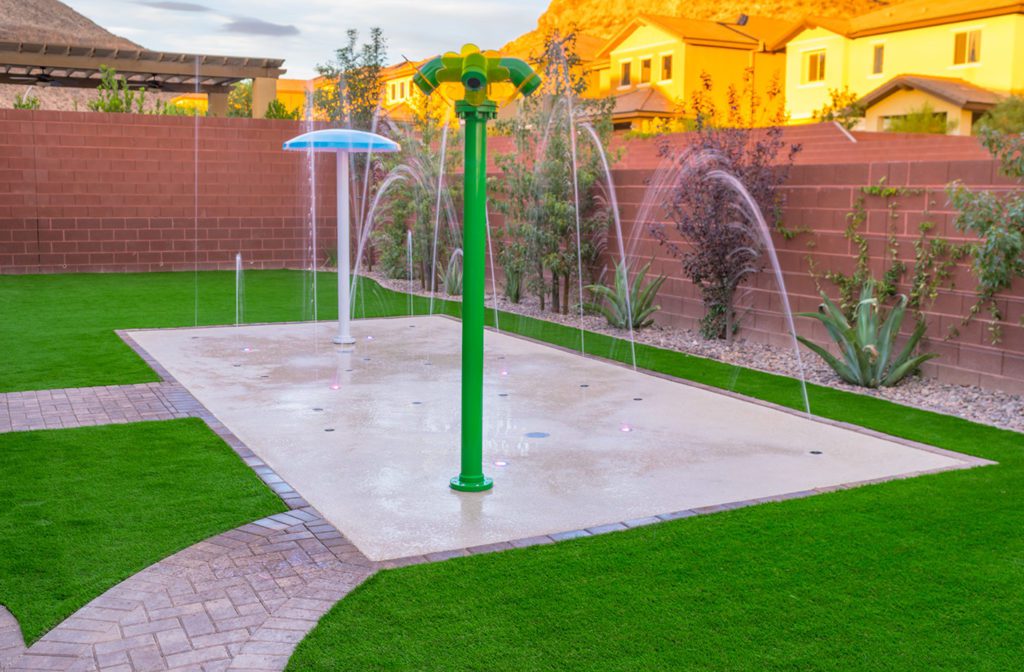
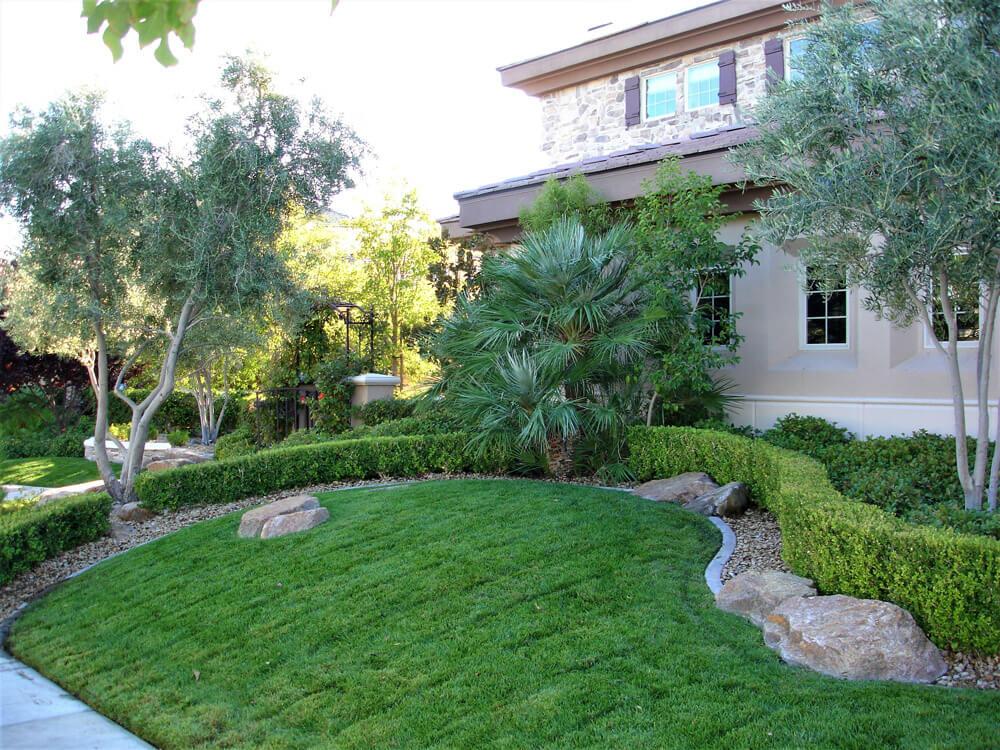
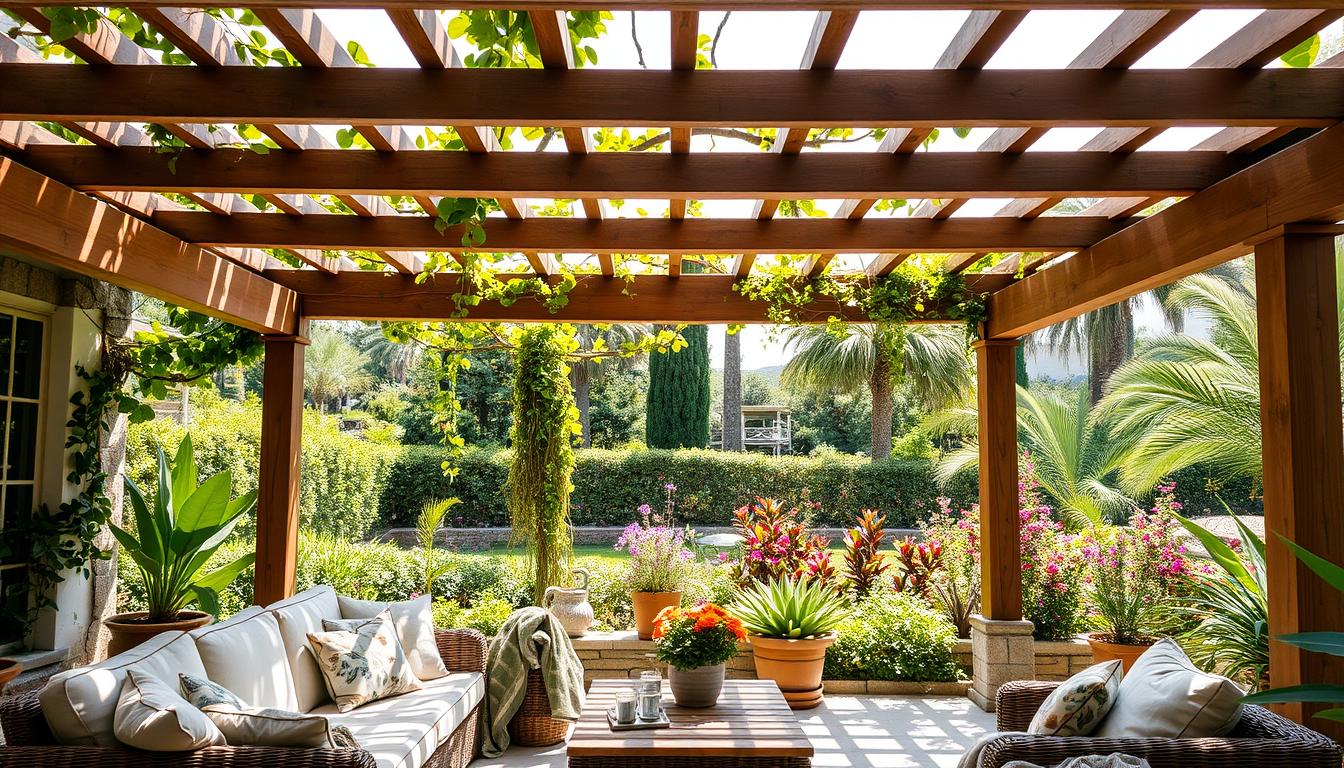
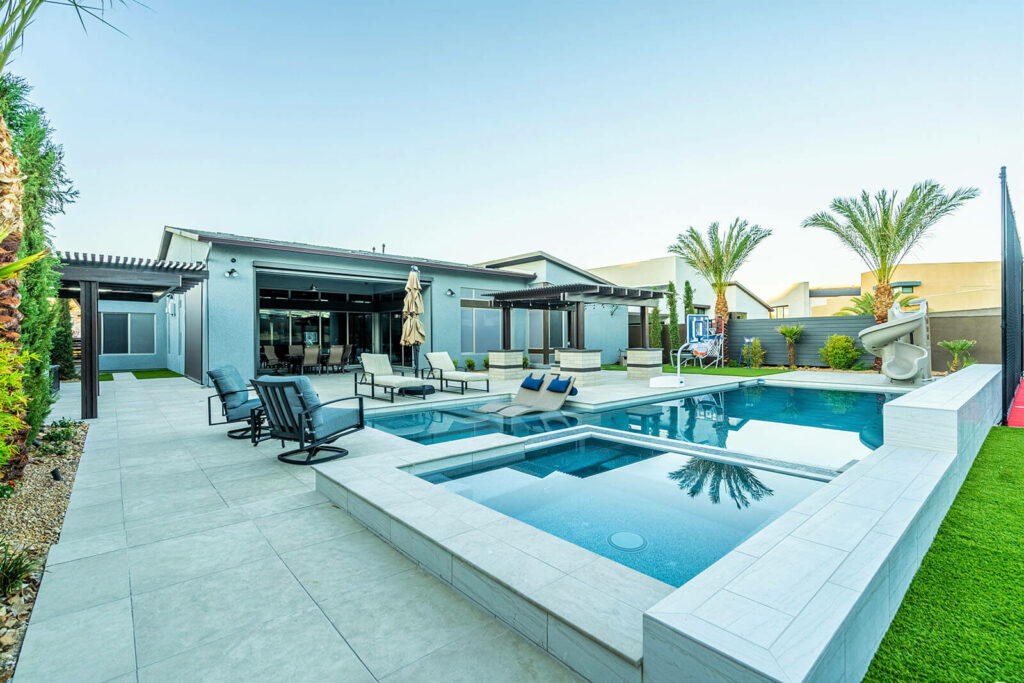
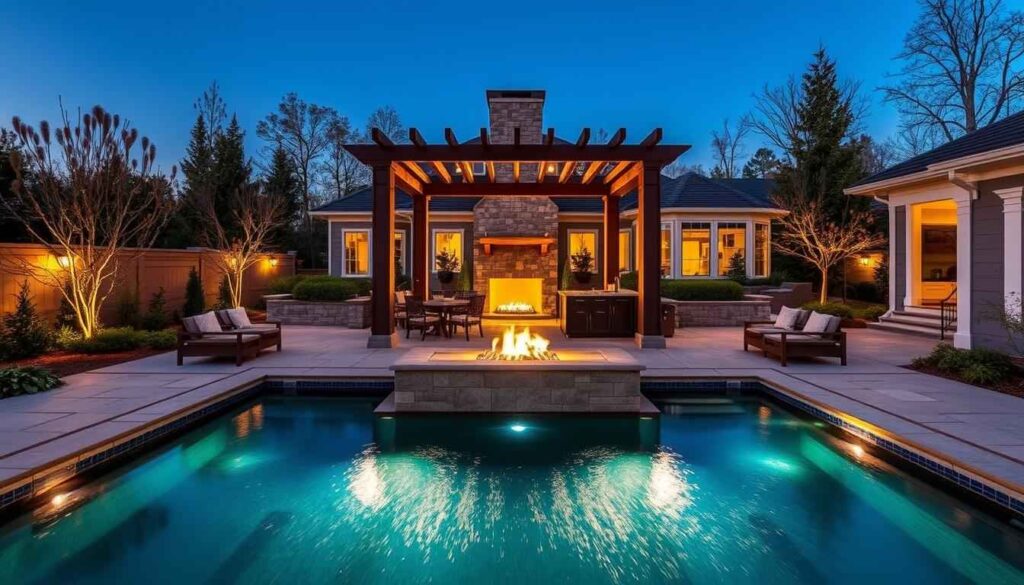
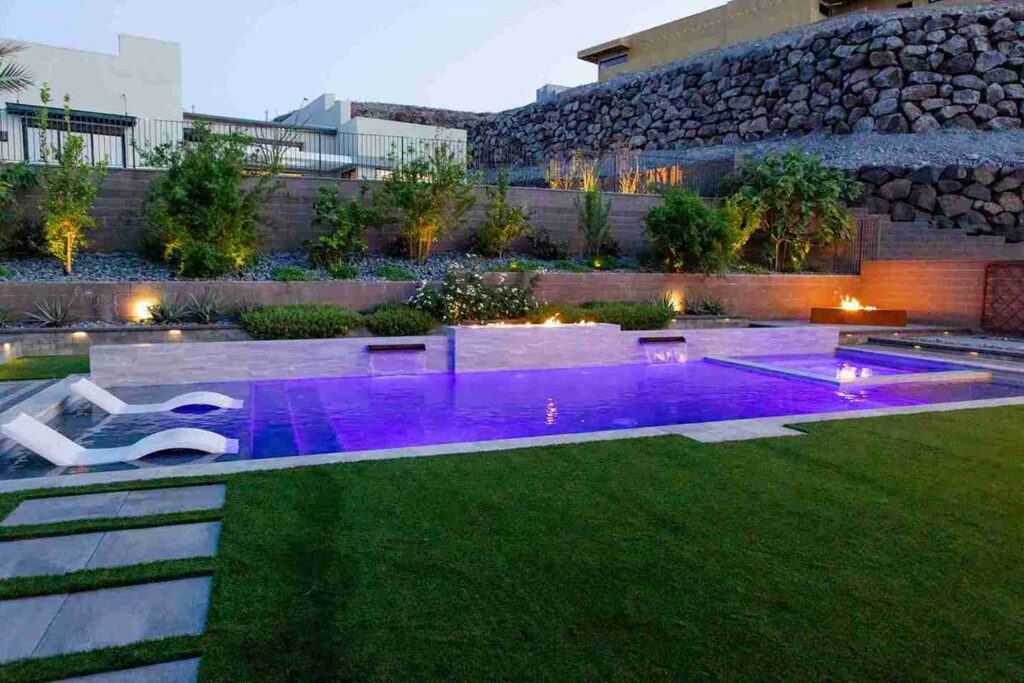
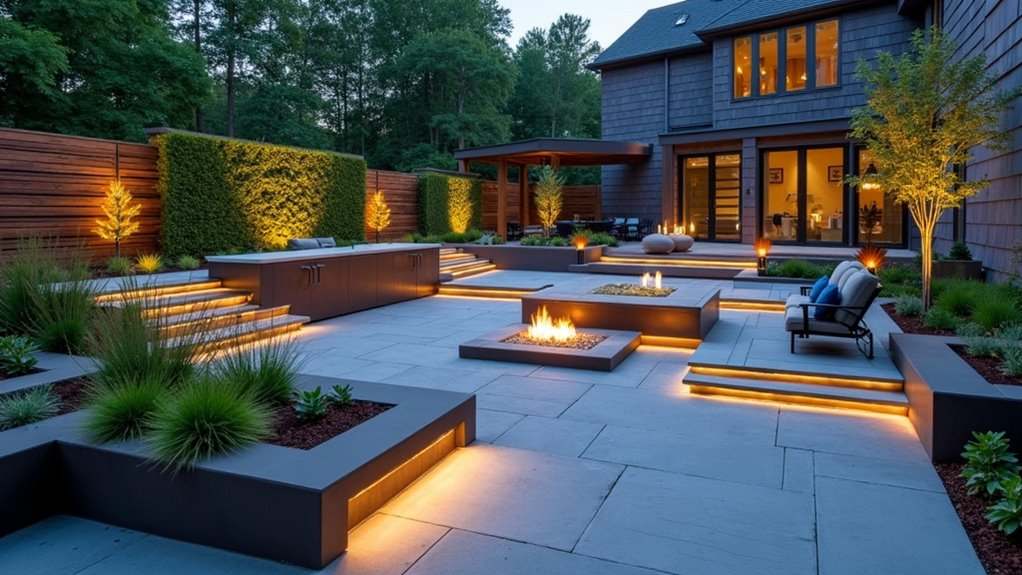
You stood at the backyard edge and imagined evening gatherings. You wanted a clear plan, fire pool features that offered controlled warmth, and a visible focal point.
Start by defining your goal. Decide if one accent or several will mark the pool area and adjacent space. Measure clearances and confirm gas or propane as a safe source.
Typical units use a burner and igniter. You get adjustable flame height, easy maintenance, and added property value without tending wood. Expect pricing to start around $2,500 for a bowl and $5,000–$8,000 with installation for complex jobs.
Plan for permits, contractor licensing, and HOA rules. Shortlist bowls and brands like Taylormade Landscapes. Sequence excavation, gas rough-in, inspection, and final set to avoid rework.
Why add pool fire features to your outdoor space
A single flame source can redefine how you use outdoor living space after dusk. It extends usable hours and adds targeted warmth for guests.
Ambiance, warmth, and nighttime appeal
Fire bowls create a cozy, inviting atmosphere for entertaining. They give steady flames without wood or constant tending.
Place a unit near seating to anchor conversations. The controlled flame height lets you switch from a soft glow to a bold statement.
Boosting backyard value and guest experience
Well-integrated elements read as resort-style design. Homeowners report higher appeal when the feature complements decking and coping.
Scupper-integrated units deliver coordinated water features and flame. Scale each unit to deck width and seating paths.
Verify burner BTU range, ignition kit, and media compatibility.
Check anchoring, lids, wind guards, and maintenance needs by material.
Use pairs to frame sightlines around pool and spa areas.
Material
Strength
Maintenance
GFRC
Light, durable
Periodic sealing
Copper
Premium look
Patina care
Powder-coated steel
Clean lines
Chip inspection
Fuel choices and ignition: natural gas vs. propane
Select the right gas source to ensure consistent flames and safe operation. Decide early. The choice affects line sizing, concealment, and controls.
Gas line planning, tank concealment, and flame control
Use natural gas when a plumbed line is available. It gives steady output and fewer tank concerns. Choose propane when natural gas is not reachable. Plan for a properly sized tank and regulator.
Choose fuel based on availability. Use natural gas when you can plumb a line; select propane with a sized tank otherwise.
Size the gas line to meet BTU demand. Confirm run length, pipe diameter, and regulator specs.
Conceal propane tanks in ventilated cabinets or built-in lockers that meet clearance rules.
Pick ignition: match-lit, push-button, or electronic for automation and remote control.
Install an accessible shutoff key valve. Route lines away from high-traffic paths and protect runs in conduit.
Add a wind guard to stabilize flames and reduce lift in breezy areas.
Schedule professional installation and inspections. Verify pressure tests, tune the air shutter and gas flow, and document maintenance intervals for long-term safety.
Codes, clearances, and safety essentials around the pool
Confirm code compliance before you buy or site any flame-producing unit in your backyard. Check local building rules for setbacks, permits, and required inspections. This reduces rework and inspection delays.
Key clearances and installation basics
Keep the unit on a stable, level base. Maintain manufacturer minimum distances from combustibles and structures. Install a shutoff that is visible and reachable.
Verify local building permit needs before purchase.
Keep units away from handrails and the pool edge to avoid tripping and heat exposure.
Use only approved fuel and components from the original source.
Plan for prevailing winds to prevent flame blowout or backdrafts.
Concern
Minimum
Action
Clearance from structures
Manufacturer spec (typ. 3–6 ft)
Measure and mark before siting
Base
Level, noncombustible pad
Pour concrete or use rated pavers
Inspection
Initial + annual
Check ignition, burner ports, media
Train household members on emergency steps and keep a fire extinguisher and shutoff info posted. Never leave a lit unit unattended. For all work, hire a licensed pro who follows local building codes and documented safety procedures.
Planning your pool area layout and design
Start by sketching a simple site plan that shows doors, seating, and walk lines. Mark gates, steps, and utility zones. This prevents surprises during installation.
Place units where people gather. Align a pool fire feature with lounge groupings so the flame is visible but not uncomfortably close. Keep clear circulation from doors to seating areas and pool entries.
Positioning near seating areas, paths, and boundaries
Use symmetry to frame key views. Pair bowls at spa corners or opposite sides to balance the pool area. Respect setbacks from fences and utilities. Do not block sightlines or walk paths.
Balancing flame with water elements and overall design
Coordinate scupper flow and the sound of water with the visual rhythm of flame. Match bowl finishes to coping and decking for a cohesive style. Stagger heights on pedestals to add depth.
Map circulation first. Keep walking paths clear.
Right-size the units for the available space.
Plan service access for valves and igniters.
Step-by-step installation overview for a fire bowl by the pool
Start the install by preparing a stable, level pad sized for the bowl and expected load. Excavate as needed. Compact the base and confirm the pad meets the manufacturer’s weight rating.
Site prep and level base setup
Place temporary marks for clearances and service access. Use compacted gravel or a concrete pad. Verify the pad is level and cure time is complete before setting heavy materials.
Gas and water line rough-in and inspections
Run the gas line in approved conduit sized to the BTU demand. Locate and install the keyed shutoff per the plan.
If you use a combined water-and-flame bowl, run a dedicated water supply with isolation valves. Pressure-test both gas and water lines. Schedule the required inspection and regulator verification before covering lines.
Setting the bowl, burner, and media
Set the bowl on the pad and anchor per manufacturer instructions. Install the burner assembly and confirm orifice sizing matches the gas source.
Add media such as lava rock or tempered glass per spec. Keep burner ports clear to ensure even distribution of flames.
Ignition, flame tuning, and final safety checks
Connect the ignition system and protect electrical connections from moisture. Purge air from the line, then test ignition and steady operation.
Adjust the air shutter and gas flow to minimize soot and lift while keeping a steady flame. Complete final checks: clearances, valve labeling, and on-site user instructions for the pool area.
Step
Key action
Verification
Site prep
Excavate, compact, pour pad
Level check, weight rating
Rough-in
Run gas/water in conduit
Pressure test, inspector sign-off
Install
Set bowl, anchor, add media
Anchor torque, clear burner ports
Commission
Ignition, purge, tune
Stable flames, labeled shutoff
Budgeting and pricing: from entry to luxury fire features
Estimate costs early so your design choices match the budget and timeline.
Entry bowls sell for about $700–$750. Many curated models start near $2,500 before labor. Mid-range water-and-flame bowls fall around $2,438–$2,506. Premium copper options reach $6,399 or more.
Include professional installation. Expect total projects to commonly land in the $5,000–$8,000 range for complex runs, inspections, and concealment.
What drives price
Materials: copper costs more; GFRC and powder-coated steel cost less.
Size and BTUs: larger bowls and higher-output burners require bigger lines and add to labor.
Automation and ignition: electronic systems and smart controls raise electrical and hardware costs.
Water integration: scuppers need pumps, valves, and additional plumbing labor.
Site work and permits: trenching, pedestals, coring, and fees add time and expense.
Item
Typical cost
Notes
Entry bowl
$700–$750
Basic concrete or simple scupper
Mid-range bowl
$2,400–$2,600
Water-and-flame options, refined finishes
Premium copper bowl
$6,000–$6,500
High-end material, longer lead time
Professional install
$5,000–$8,000
Gas runs, inspections, concealment
Reserve a contingency of 10–15%. Plan permits and inspection timelines into your schedule. Label budgets for materials, labor, and unexpected site conditions.
Notable brands, models, and options to consider
Match product families so multiple units read as a single, intentional design. Review Sedona, Maya, and Cazo lines for cohesive scale and finish choices. Use the same family to simplify parts and aesthetics.
Design-forward picks and sizing
Consider Luxe vases when you need vertical presence. A 24″x36″ tall vase runs near $2,499. A 30″ Luxe lists around $2,299.
Style ideas to inspire your pool fire feature
Anchor seating with a raised bowl. Use scale to match your deck and the home’s lines.
Corner accents, symmetry, and island focal points
Place paired bowls at opposite corners to create balanced sightlines. Mirror heights so the horizon reads level.
Create an island platform for a vase bowl when you need a central focal point. Keep safe offsets from the water edge and walking paths.
Pair bowls at corners for symmetry and guided views.
Use a raised vase to elevate flames above water for a strong focal point.
Place compact bowls along paths to mark routes while preserving clearance.
Feature walls, scuppers, and landscape lighting
Combine scupper flows with burners for layered sensory effect. Tune water volume so sound does not drown the flame.
Backlight steps and walls with low-voltage lamps. Keep glare off the viewing axis so the flame remains visible at night.
Layout
Best use
Material tips
Paired corners
Symmetry, sightlines
Match finishes; mirror heights
Island bowl
Central focal point
Use a vase; secure platform
Feature wall
Layered light and water
Coordinate scuppers and lighting
Conclusion
Close your design loop by confirming safety, budget, and service access before final commissioning.
Verify fuel selection and ignition. Size gas runs correctly. Hire a licensed installer for pressure tests and inspections.
Set realistic costs. Include equipment, permits, labor, and a 10–15% contingency. Expect pro installs to add several thousand dollars to equipment price.
Complete a systems test. Tune the flame for stability. Inspect media, burners, and igniters. Schedule seasonal checks.
Document manuals, permits, and service contacts. Keep operation steps and shutoff locations accessible. Maintain records for warranty and resale value.
Follow codes and maintain routines. That protects your backyard area and preserves long-term performance.
Ready to move forward? Take the next step—consult a certified fire feature professional to finalize your design and start your installation with confidence.
FAQ
How do I install a fire feature next to my pool?
Start with a site survey. Mark clearances from water, decking, and combustible materials. Set a level, compacted base using crushed rock or concrete as required by the bowl manufacturer. Run fuel lines and electrical conduit before placing the bowl. Install the burner, media, and ignition system per manufacturer instructions. Have a licensed plumber or gas technician connect and pressure-test gas lines. Obtain local inspections and final approval before first ignition.
What permits and code checks are required for a fire-and-water installation?
Checklocal building and fire department regulations. You typically need a building permit and a gas permit for natural gas or buried propane lines. Maintain prescribed clearances from pools, structures, and property lines. Provide documentation for installed equipment and show compliance with manufacturer clearances. Schedule inspections at rough-in and final stages.
Should I use natural gas or propane for my feature?
Natural gas works well if you have an existing line; it offers continuous supply and lower operating cost. Propane is viable where no gas service exists. Plan tank concealment and ventilation. Choose fuel based on site access, run length, installation cost, and desired flame height. Consult a licensed installer for pressure and regulator sizing.
What materials hold up best near water and chlorine?
Choose corrosion-resistant materials. GFRC (glass-fiber reinforced concrete) resists pool chemicals and stays stable. Copper offers a premium patina but needs proper sealing. Powder-coated stainless or marine-grade stainless steel handles moisture and chlorination well. Match material choice to maintenance willingness and style goals.
How close can the flame be to the pool edge or seating?
Follow manufacturer clearance charts and local codes. Maintain safe horizontal and vertical distances from water, handrails, and combustible seating. A common practice is 3–6 feet from seating and more from flammable materials. Exact distances depend on burner output and orientation. Verify during design and inspection.
Can I integrate a fire bowl with existing water features?
Yes. Scupper-integrated bowls and combined fire-and-water fixtures are common. Ensure separate plumbing and secure electrical/gas segregation. Design water flow paths to avoid splashing onto burner components. Coordinate with pool and landscape contractors to align mechanical systems and schedules.
What are typical costs for a basic bowl and pro installation?
Entry level bowls and simple installs start at a few hundred to a few thousand dollars for materials. Professional installation, gas line work, and permitting typically add several hundred to several thousand dollars depending on distance to service and site complexity. High-end custom bowls, automation, and premium finishes raise costs further.
Do I need a separate gas line for multiple features?
You can manifold multiple burners to a single supply. Size the main line and individual valves to maintain adequate pressure and consistent flame height under full demand. Run a dedicated meter or service if combined demand is high. Have a licensed designer calculate pipe sizing and regulator capacity.
How do I conceal a propane tank or gas meter near the pool area?
Use ventilated landscaping enclosures or decorative screens designed for propane. Maintain required setbacks and ventilation clearances. For natural gas meters, build a noncombustible screen or place plants at code-approved distances. Keep access for service and emergency shutoff clearly visible.
What safety checks should I perform before lighting a bowl for the first time?
Confirm gas lines are pressure-tested and capped until inspection. Verify burner assembly and orifice sizing. Ensure ignition and flame failure devices function. Check media placement to prevent fuel pooling. Confirm required clearances. Have the installer perform the first ignition and demonstrate shutoff and emergency procedures.
How do I tune flame height and appearance?
Adjust the regulator and use installed valves to set pressure. Many burners include air shutters or secondary valves to fine-tune the mix. Media placement affects flame visibility. Test adjustments at night to evaluate appearance. Do not increase pressure beyond manufacturer ratings.
What maintenance is required for a bowl near a pool?
Inspect burner ports for clogs from debris or media. Clean media and drain pans to prevent water accumulation. Check seals and gas fittings yearly. Flush or replace loose-fill media as recommended. Refinish powder coats or stone surfaces when wear appears. Schedule professional service at regular intervals.
Can I automate ignition and remote control my feature?
Yes. Many systems support millivolt, electronic ignition, or smart controllers. Automation allows timed schedules, remote on/off, and integration with landscape lighting. Ensure controllers are rated for outdoor use and follow electrical codes. Use licensed electricians for low-voltage and main power connections.
What design placements work best for guest comfort and circulation?
Place bowls near seating clusters with adequate angular clearance. Use low-profile features along walkways to avoid glare. Group features symmetrically for formal layouts or stagger them for organic designs. Provide clear paths and maintain noncombustible surfacing under and around fixtures.
Which brands and models are recommended for quality and longevity?
Choose reputable manufacturers with published specs and warranties. Consider names known for outdoor bowls and burners, and compare material options like GFRC, copper, and stainless. Review local supplier portfolios and request installation references. Prioritize components with service parts available.
How to Maintain and Care for an In-Ground Trampoline: Essential Las Vegas Guide
Protect Your Investment & Keep Your Family Safe With Taylormade Landscapes Las Vegas, where temperatures soar and UV exposure is intense, proper maintenance of your in-ground trampoline isn’t just recommended—it’s essential. The harsh desert climate can accelerate wear and tear, potentially compromising both the performance and safety of your backyard investment. This comprehensive guide provides Las Vegas homeowners with critical maintenance strategies to extend your trampoline’s lifespan, ensure optimal performance, and most importantly, keep your family safe while they enjoy countless hours of outdoor fun.
Why Proper Maintenance Matters in Las Vegas
Las Vegas presents unique challenges for in-ground trampoline owners. The extreme heat, minimal rainfall, and abundant sunshine create conditions that can rapidly degrade materials if not properly maintained. Understanding these local factors is crucial for effective backyard care.
Extended Lifespan
Regular maintenance, including care for the springs, can double or triple your trampoline’s useful life, protecting it from premature replacement costs. In Las Vegas’ harsh climate, neglected trampolines often need replacement within 2-3 years, while well-maintained ones can last 8-10 years.
Enhanced Safety
Safety is paramount when it comes to in-ground trampolines. Regular inspections and maintenance prevent dangerous conditions like torn mats, broken springs, or compromised structures, especially when you routinely inspect frame components. This is especially important for in-ground models where structural issues may be less visible.
Optimal Performance
A well-maintained trampoline provides consistent bounce and performance. In Las Vegas, where heat and water exposure can affect spring tension and material elasticity, regular adjustments ensure the jumping experience remains enjoyable year-round.
Aesthetic Appeal
In-ground trampoline is designed to blend seamlessly with your landscape. Proper maintenance of the springs and other components preserves this integration, keeping your outdoor space looking beautiful and well-designed rather than becoming an eyesore due to harsh weather damage.
Regular Cleaning Procedures
In Las Vegas, where dust storms are common, regular cleaning is essential to prevent damage and maintain your in-ground trampoline‘s appearance and functionality—so always make sure to clear away dirt, leaves, and buildup.
Weekly Cleaning Routine
Remove Debris: Clear leaves, twigs, and sand from the mat surface and surrounding areas at least weekly. After dust storms, immediate cleaning is recommended.
Gentle Washing: Use a soft brush and mild soap solution to clean the mat surface. Avoid harsh chemicals that can degrade materials faster in the intense Las Vegas sun.
Rinse Thoroughly: Ensure all soap residue is completely rinsed away to prevent material degradation and slippery surfaces.
Dry Completely: Allow the trampoline to dry fully before use. In Las Vegas, this typically happens quickly, but morning dew can create temporary moisture.
Monthly Deep Cleaning
Frame Cleaning: Wipe down the exposed frame parts with a damp cloth to remove dust buildup and check for early signs of rust.
Spring Inspection: Clean around spring areas that could affect performance or cause corrosion.
Drainage Check: Ensure drainage systems are clear of debris to prevent water pooling during rare Las Vegas rainfall events.
“In Las Vegas, dust accumulation is a major concern for in-ground trampoline. Monthly deep cleaning prevents this dust from degrading materials and affecting performance.”
– Taylor Made Landscapes Maintenance Team
UV Protection in Las Vegas’ Intense Sun
Las Vegas receives approximately 310 sunny days per year, making UV protection critical for extending your trampoline’s lifespan.
Protective Treatments
UV-Resistant Sprays: Apply UV-resistant protectants specifically designed for trampoline every 3-4 months. In summer, increase to monthly applications.
Mat Conditioners: Use mat conditioners to prevent cracking and brittleness caused by extreme temperature fluctuations common in the desert.
Frame Protection: Apply rust-resistant coatings to metal components, especially important in areas where irrigation systems might increase humidity around the trampoline.
Strategic Shade Solutions
Consider installing shade structures or strategically planting trees to reduce direct sun exposure during peak hours. This not only protects your trampoline but also makes it more comfortable for use during hot summer days.
Protect Your Trampoline from Las Vegas Sun Damage
Our professional UV protection treatments extend your trampoline’s life by up to 3 years. Schedule your protection service today!
Regular inspection of your trampoline’s structural components is critical for safety and longevity, especially in Las Vegas where extreme temperature fluctuations can stress materials.
Monthly Frame Checks
Rust Inspection: Check all metal components for signs of rust or corrosion, paying special attention to areas where the frame meets the ground.
Structural Integrity: Verify that the frame remains level and properly supported. Las Vegas soil can shift during extreme temperature changes.
Retaining Wall Examination: If your installation includes a retaining wall, inspect for cracks or movement that could compromise the trampoline’s stability.
Spring Maintenance
Tension Check: Test spring tension to ensure consistent bounce. Uneven tension can lead to performance issues and increased wear.
Rust Prevention: Apply silicone-based lubricant to the trampoline springs quarterly to prevent rust and maintain proper function.
Replacement Schedule: In Las Vegas’ climate, springs typically need replacement every 2-3 years. Replace any showing signs of stretching or corrosion immediately.
Safety Alert: Never use a trampoline with damaged or missing springs. Even one compromised spring can affect the entire jumping surface and create unsafe conditions.
Mat and Pad Care
The jumping mat and safety pads endure the most direct exposure to Las Vegas’ intense sun and heat, making them particularly vulnerable to damage without proper care over many years.
Mat Inspection and Care
Check for Tears: Inspect the mat monthly for small tears or holes that can quickly expand with use. In Las Vegas’ dry climate, can become brittle and more prone to tearing.
UV Protection: Apply specialized trampoline mat protectant quarterly to guard against UV degradation.
Stitching Examination: Verify that all stitching remains intact, especially around the edges where the mat connects to springs.
Safety Pad Maintenance
Padding Condition: Ensure safety pads fully cover springs and frame components. Replace pads showing signs of cracking or deterioration.
Secure Attachments: Check that all pad attachments are secure and properly positioned.
Seasonal Storage: During extreme summer heat waves, consider removing and storing pads in a cool, dry place to extend their lifespan.
Drainage System Maintenance
While Las Vegas receives minimal rainfall, proper drainage is still critical for trampoline. Flash floods and irrigation runoff can quickly create problems if drainage systems aren’t maintained.
Quarterly Drainage Checks
Clear Debris: Remove any accumulated debris from drainage channels and pipes quarterly.
Flow Testing: Pour water into drainage areas to verify proper flow away from the trampoline pit.
Gravel Inspection: Check that drainage gravel remains properly distributed and hasn’t compacted over time.
Monsoon Season Preparation
Las Vegas experiences occasional summer monsoon storms with heavy rainfall. Before monsoon season (July-September), perform these additional maintenance tasks:
Deep Drainage Cleaning: Ensure all drainage pipes and channels are completely clear.
Sump Pump Check: If your installation includes a sump pump, verify it’s functioning properly.
Retaining Wall Inspection: Check that retaining walls are secure and won’t allow soil erosion during heavy rain.
Water pooling under your in-ground trampoline can cause serious damage to the frame and create unsafe jumping conditions. After any significant rainfall, check your trampoline pit for proper drainage.
Seasonal Maintenance Checklists
Las Vegas has distinct seasonal challenges that require specific maintenance approaches for in-ground trampoline.
Spring (March-May)
Comprehensive Inspection: Perform a complete system check after winter.
UV Protection: Apply fresh UV protectant before summer heat intensifies.
Spring Tension: Adjust spring tension as temperatures begin to rise.
Drainage Preparation: Ensure drainage systems are clear before monsoon season.
Summer (June-August)
Increased Cleaning: Clean more frequently to remove dust from summer winds.
UV Maintenance: Reapply UV protectant monthly during peak sun exposure.
Heat Monitoring: Check mat temperature during afternoons; consider a shade solution if too hot.
Monsoon Readiness: Verify drainage systems before potential flash floods.
Fall (September-November)
Post-Summer Inspection: Check for summer heat damage to all components.
Frame Adjustment: Verify frame remains level after summer expansion/contraction.
Spring Replacement: Replace any springs showing wear after heavy summer use.
Winterization: Prepare for cooler temperatures with appropriate protectants.
Winter (December-February)
Cover Consideration: Though Las Vegas winters are mild, a cover can protect from winter debris.
Moisture Check: Inspect for any moisture accumulation during cooler months.
Frame Protection: Apply rust protectant to guard against winter morning condensation.
Planning: Schedule any major repairs or replacements during lower-use winter months.
Safety Considerations: Are In-Ground Trampolines Safer?
Trampoline is generally considered safer than above-ground models, but proper maintenance is essential to maintain this safety advantage.Safety Advantages
Safety Benefits
Reduced fall height minimizes injury risk
No ladder access prevents unsupervised young children
Seamless integration with landscape eliminates under-trampoline hazards
Lower profile reduces wind exposure and tipping risk
Maintenance Requirements
Drainage issues can create unsafe jumping conditions
Hidden frame damage may be harder to detect
Retaining wall failures can compromise structural integrity
Requires more complex inspection procedures
Maintaining Safety Through Proper Care
Regular Inspections: Monthly safety checks of all components are essential.
Immediate Repairs: Address any damage or wear immediately, never allowing use with compromised parts.
Professional Assessment: Schedule annual professional safety inspections to catch hidden issues.
Rules Enforcement: Maintain and enforce clear safety rules for all users.
“While in-ground trampolines offer inherent safety advantages, these benefits are quickly lost without proper maintenance. Regular professional inspections are the best insurance against preventable injuries.”
– Safety Expert, Taylormade Landscapes
Integrating Trampoline Care with Landscape Maintenance
Your in-ground trampoline is an integral part of your overall landscape design. Coordinating trampoline maintenance with your broader landscape care ensures both function and aesthetics.
What is Landscape Maintenance?
Comprehensive landscape maintenance includes caring for all outdoor elements, from plants and irrigation to recreational features. An integrated approach ensures your entire outdoor space remains beautiful, functional, and safe.
How to Design a Small Front Yard Landscape
When designing a small front yard landscape that complements your backyard, consider these principles:
Consistent Materials: Use similar hardscaping materials in front and back for visual continuity.
Complementary Plants: Select drought-resistant plants that thrive in Las Vegas while complementing your recreational spaces.
Integrated Drainage: Design landscape drainage that works with your drainage system.
Visual Flow: Create design elements that guide the eye naturally between spaces.
Coordinated Maintenance Schedule
Irrigation Considerations: Adjust sprinklers to avoid excessive water near your frame.
Plant Trimming: Maintain appropriate clearance between plants and your trampoline.
Pest Management: Coordinate pest control to protect your landscape areas.
Seasonal Alignment: Schedule major landscape maintenance during the same seasonal windows.
Protect Your Investment with Professional Maintenance
Maintaining an in-ground trampoline in Las Vegas requires specialized knowledge and consistent care. While this guide provides essential DIY maintenance steps, professional service ensures your trampoline remains safe, functional, and beautiful for years to come, helping to protect trampoline systems from heat, dust, and long-term wear.
Why Choose Taylor Made Landscapes?
Las Vegas Specialists: We understand the unique challenges our local climate presents for in-ground trampolines.
Comprehensive Service: From installation to ongoing maintenance, we provide complete care solutions.
Safety Focus: Our certified technicians prioritize safety in every maintenance visit.
Integrated Approach: We coordinate trampoline care with overall landscape maintenance for a cohesive outdoor space.
Schedule Your Professional Maintenance Today
Protect your investment and ensure your family’s safety with expert in-ground trampoline maintenance from Taylor Made Landscapes.
Don’t wait until problems develop with your in-ground trampoline. Regular professional maintenance is the most cost-effective way to protect your investment and ensure your family enjoys safe, worry-free fun for years to come. Find our location or contact us today to learn more about our in-ground trampoline installation and maintenance services in Las Vegas.
Best Splash Pads for Backyard: Create Your Own Water Park at Home
When summer temperatures soar, a backyard splash pad offers the perfect solution for keeping kids cool without the expense and maintenance of a traditional swimming pool. These water play features combine the joy of sprinklers with shallow wading areas, creating endless entertainment for children of all ages.As parents ourselves, we’ve researched and tested numerous models to bring you this comprehensive guide to the best splash pads for backyard use. Whether you have toddlers just discovering water play or older kids seeking summer thrills, our recommendations will help you transform your outdoor space into a refreshing oasis.
What Are Backyard Splash Pads?
Splash pads provide hours of summer fun with minimal setup and maintenance
Splash pads are shallow water play areas designed with no standing water, making them safer alternatives to traditional pools. They typically feature a non-slip mat connected to a standard garden hose, with water spraying from various points across the surface.
Unlike inflatable pools, splash pads don’t require filling and draining. The water continuously recirculates or drains away, conserving water while providing endless fun. Most models are portable, easy to set up, and perfect for children aged 2-12 years.
Benefits of Backyard Splash Pads
Types of Splash Pads
Safer than traditional pools with no standing water
Inflatable splash pads with sprinkler rings
Easy setup with standard garden hose connection
Splash pads with wading areas
More affordable than permanent water features
Themed designs with characters and activities
Portable and storable during off-seasons
Multi-feature water play centers
Suitable for various age groups
Splash pads with slides and tunnels
Conserves water compared to filling pools
Simple sprinkler mats for younger children
How to Choose the Best Splash Pad for Your Backyard
Before diving into our top recommendations, consider these key factors that will help you select the perfect splash pad for your specific needs:
Measuring your available space is crucial before purchasing a splash pad.
Size and Space
Measure your available yard space before purchasing. Most splash pads range from 60″ to 12′ in diameter. Allow for additional splash zone around the pad (typically 3-5 feet) to protect nearby furniture or plants.
Age Appropriateness
Different splash pads are designed for specific age groups. Models for toddlers feature gentle sprays and soft surfaces, while those for older children may include more powerful jets and interactive features.
Water Pressure Requirements
Check the recommended water pressure for optimal performance. Some models require higher pressure to function properly, which may affect spray height and overall experience.
Material Quality
Look for durable PVC or vinyl construction with reinforced seams. Higher quality materials resist tears and punctures, extending the lifespan of your splash pad through multiple summers.
Drainage System
Consider how water drains from the pad. Some models collect water in a shallow basin, while others allow continuous drainage. Your yard’s slope and soil type may influence which system works best.
Setup and Storage
Most splash pads should be quick to set up and easy to fold for storage. Check the weight and folded dimensions if you have limited storage space during off-seasons.
If you’re looking for something far more durable, long-lasting, and fully integrated into your backyard design, Taylormade Landscapes offers custom-built residential splash pads that go beyond traditional inflatable options. These professionally installed splash pads are perfect for families who want a luxury, maintenance-friendly, and safe water play area that blends seamlessly with their outdoor living space.
Why Choose a Taylormade Custom Splash Pad?
Commercial-grade materials designed for extreme Las Vegas heat
Built-in drainage system for clean, low-maintenance operation
The SplashEZ 3-in-1 combines a sprinkler, splash pad, and shallow wading pool in one versatile design. At 68 inches in diameter, it’s spacious enough for multiple children while remaining compact enough for most backyards.
Key Features:
Educational design with letters, numbers, and sea creatures
BPA-free, non-toxic materials
360° sprinkler system with adjustable water pressure
Reinforced edges to prevent tearing
Shallow 2-inch wading area for toddlers
Specifications:
Diameter: 68 inches
Recommended Age: 12 months and up
Material: Heavy-duty PVC
Maximum Water Height: 3 feet (adjustable)
Setup Time: Under 2 minutes
Pros
Educational design promotes learning during play
Versatile 3-in-1 functionality
Quick setup with standard garden hose
Durable construction lasts multiple seasons
Cons
Water pressure affects spray height significantly
May slide on very smooth grass
Needs regular cleaning to prevent mildew
2. WOW Sports 12ft Super Splash Pad
For larger families or those with bigger backyards, the WOW Sports 12ft Super Splash Pad offers expansive water play space. This premium option features heavy-duty construction and an impressive 360° soaker sprinkler system.
Key Features:
Extra-large 12-foot diameter play area
Heavy-duty pontoon-style inflatable ring
360° sprinkler system with multiple spray patterns
8-inch deep wading pool section
Includes anchor stakes for stability
Specifications:
Diameter: 12 feet
Recommended Age: 3 years and up
Material: Commercial-grade PVC
Maximum Water Height: 5 feet
Setup Time: 5 minutes
Pros
Spacious design accommodates multiple children
Commercial-grade materials ensure longevity
Stabilization stakes prevent movement during play
Deeper wading area for more versatile play
Cons
Higher price point than smaller models
Requires more storage space when not in use
Needs level ground for proper water distribution
3. Obuby Sprinkler & Splash Play Mat
The Obuby Splash Mat is perfect for younger children and toddlers, featuring gentle water sprays and a colorful, engaging design. This budget-friendly option offers excellent value while still providing hours of backyard fun.
Key Features:
Colorful alphabet and animal designs
Non-slip textured surface
Adjustable water pressure for spray height control
Inflatable outer ring contains water
Compact and easy to store
Specifications:
Diameter: 60 inches
Recommended Age: 12 months to 6 years
Material: BPA-free PVC
Maximum Water Height: 3 feet
Setup Time: Under 2 minutes
Pros
Affordable price point
Perfect size for toddlers and young children
Easy to set up and store
Gentle sprays ideal for first-time water play
Cons
Smaller size limits number of children
Less durable than premium models
Outer ring may deflate during extended use
4. Allaugh 67-inch Octopus Splash Pad
The Allaugh Octopus Splash Pad features a charming ocean theme that captivates children’s imagination. With its 67-inch diameter, it’s ideal for medium-sized backyards and accommodates 2-3 children comfortably.
Key Features:
Vibrant octopus design with underwater theme
Thickened PVC material for increased durability
Multiple spray points for varied water patterns
Shallow wading pool functionality
Adjustable water pressure system
Specifications:
Diameter: 67 inches
Recommended Age: 1-12 years
Material: Eco-friendly PVC
Maximum Water Height: 3.5 feet
Setup Time: 3 minutes
Pros
Engaging theme keeps children interested
Versatile for different age groups
Good balance of size and features
Reasonable price point
Cons
Requires regular inflation checks
Water collection can be uneven on sloped ground
Colors may fade after extended sun exposure
5. Banzai Aqua Drench 3-in-1 Splash Park
The Banzai Aqua Drench offers more than just a splash pad, combining a small slide, sprinkler features, and a splash pool in one compact design. This multi-feature option is perfect for families seeking variety in their water play.
Key Features:
Integrated water slide with splash landing
Multiple sprinkler jets and water features
Small wading pool section
Inflatable side walls for water containment
Connects to standard garden hose
Specifications:
Dimensions: 88″ x 65″ x 25″
Recommended Age: 3 years and up
Material: Vinyl
Maximum Water Height: Variable by feature
Setup Time: 10-15 minutes
Pros
Multiple play features in one unit
Slide adds excitement for older children
Good value for the variety offered
Compact footprint for smaller yards
Cons
More complex setup than basic splash pads
Less durable than single-function models
Requires more water pressure for optimal performance
Mixed reviews on longevity
6. OGEDNAC 68″ Water Sprinkler Pad
The OGEDNAC Water Sprinkler Pad focuses on creating impressive water sprays that reach up to 5 feet high, making it perfect for older children and adults who enjoy more active water play. Its durable construction and high-performance sprinkler system make it a customer favorite.
Key Features:
High-pressure sprinkler system for tall water jets
Thickened PVC material (0.45mm thickness)
Reinforced connection point for hose durability
Anti-slip textured surface
Suitable for both children and adults
Specifications:
Diameter: 68 inches
Recommended Age: 3 years to adult
Material: Eco-friendly PVC
Maximum Water Height: 5 feet
Setup Time: 2 minutes
Pros
Impressive water height for active play
Suitable for all ages including adults
Thicker material than many competitors
Excellent customer reviews for durability
Cons
Requires good water pressure for optimal performance
Limited wading functionality
May be too intense for very young children
7. Plum Play Kids Splash Pad Station
The premium Plum Play Kids Splash Pad Station is a complete water play center featuring multiple interactive elements including a bubble blower, water slide, and water-reveal coloring wall. This high-end option creates a mini water park experience right in your backyard.
Key Features:
Built-in bubble blower with solution reservoir
Water-reveal coloring wall for artistic play
Small water slide with splash landing
Multiple sprinkler and spray features
Sturdy construction for extended use
Specifications:
Dimensions: 65″ x 65″ x 27″
Recommended Age: 3 years and up
Material: Heavy-duty plastic and vinyl
Maximum Water Height: Variable by feature
Setup Time: 15-20 minutes
Pros
Multiple interactive features beyond basic sprinklers
Encourages creative and imaginative play
Sturdy construction built to last multiple seasons
Creates a complete water park experience
Cons
Highest price point among splash pads
More complex setup and maintenance
Requires more storage space
Bubble solution needs regular replenishment
Installation and Maintenance Tips
Proper setup on level ground ensures optimal splash pad performance
Choosing the Perfect Location
Select a flat, level area free from rocks, sticks, and sharp objects
Ensure proximity to a garden hose connection
Consider partial shade to prevent overheating
Allow for adequate splash zone around the perimeter
Position away from structures, electrical outlets, and delicate plants
Setup Best Practices
Clear the area thoroughly before unfolding the splash pad
Consider placing a tarp underneath for additional protection
Secure with stakes if provided or recommended
Start with low water pressure and gradually increase
Test spray height before allowing children to play
Proper Maintenance
Drain completely after each use
Allow to dry fully before storing to prevent mildew
Clean with mild soap and water weekly
Inspect regularly for tears or punctures
Store in a cool, dry place away from direct sunlight
Water Conservation Tip
Consider placing your splash pad in an area of your yard that needs watering. The runoff water can help keep your lawn or garden hydrated while providing hours of fun. Some families also collect the water in buckets for later use in watering plants.
Safety Guidelines for Backyard Splash Pads
Adult supervision is essential for safe splash pad play
Essential Safety Rules
Constant Supervision: Never leave children unattended, even in very shallow water
Age-Appropriate Play: Ensure the splash pad is suitable for your child’s age and abilities
No Running: Enforce a “no running” rule to prevent slips and falls
Sun Protection: Apply waterproof sunscreen and provide shade breaks
Hydration: Offer regular water breaks, as children may not realize they’re getting dehydrated during water play
Additional Safety Considerations
Limit play sessions to 30-60 minutes to prevent overexposure
Check water temperature on hot days (surfaces can heat up)
Remove jewelry or accessories that could catch on splash pad features
Establish clear boundaries for play area
Keep electrical devices away from splash zone
Consider water shoes to prevent slipping and protect feet
Important Safety Warning
While splash pads are generally safer than pools due to minimal standing water, they still require constant adult supervision. Children can slip and fall or experience water-related accidents even in very shallow water. Never leave children unattended during splash pad play.
Frequently Asked Questions About Backyard Splash Pads
How much water do splash pads use?
Most backyard splash pads use approximately 20-40 gallons of water per hour, depending on water pressure and the specific model. This is significantly less than filling a kiddie pool, which can use 50-100 gallons in a single filling. Many splash pads also recirculate water, making them more efficient than continuous-flow options.
Can splash pads be used on concrete or decks?
While splash pads are ideally used on grass, many models can be safely used on concrete or wooden decks with proper precautions. Place a tarp or outdoor rug underneath to provide cushioning and prevent slipping. Be aware that surfaces may become very slippery, so additional non-slip mats around the perimeter are recommended for safety.
How do I fix a leak or puncture in my splash pad?
Most splash pads can be repaired using a vinyl patch kit (similar to those used for pool floats). Clean and dry the area thoroughly, apply the patch according to the manufacturer’s instructions, and allow it to cure completely before refilling. For small punctures, waterproof tape can provide a temporary fix until a proper repair can be made.
Can dogs use splash pads?
Many splash pads are durable enough for dogs to enjoy, but check the manufacturer’s recommendations first. Choose models with thicker, puncture-resistant materials if you plan to share with pets. Keep dog nails trimmed to prevent accidental tears, and never leave pets unattended on the splash pad.
How can I increase the water spray height?
Water spray height is primarily determined by your home’s water pressure. To maximize spray height: ensure your hose is fully uncoiled, use the shortest hose possible to reach the splash pad, check for and fix any leaks in hose connections, and consider using a pressure booster if your home has consistently low water pressure.
Conclusion: Choosing the Best Splash Pad for Your Backyard
A quality splash pad creates lasting summer memories for the whole family
After reviewing the best splash pads for backyard use, it’s clear that the perfect choice depends on your specific needs, space, and budget. For families with toddlers, the Obuby Sprinkler & Splash Play Mat offers gentle features and educational value. Those with larger yards and multiple children might prefer the WOW Sports 12ft Super Splash Pad for its expansive play area.
For the ultimate backyard water experience, the Plum Play Kids Splash Pad Station provides multiple interactive features that will keep children engaged for hours. Budget-conscious shoppers will find excellent value in the OGEDNAC 68″ Water Sprinkler Pad, which delivers impressive performance at a reasonable price point.
Whichever model you choose, a backyard splash pad offers a safe, affordable, and convenient way to create summer memories without the commitment of a permanent pool. With proper setup, maintenance, and supervision, your splash pad will provide seasons of refreshing outdoor fun for the whole family.
Ready to Create Your Backyard Water Paradise?
Compare our top recommendations and find the perfect splash pad for your family’s summer adventures.
How to Choose the Best Landscapers Las Vegas: Your Desert Oasis Guide
Finding the best landscapers Las Vegas isn’t just about curb appeal — it’s about protecting your home and creating a resilient outdoor space that survives our desert extremes. In the Valley, a knowledgeable landscaping company can mean the difference between a thriving oasis and expensive, avoidable replacements. This guide delivers fast, practical information so you can hire pros who know Las Vegas, North Las Vegas, and surrounding areas, save water, and boost property value.
Act now — spring slots fill fast for maintenance and installations. Check local reviews and book a free consultation with a top-rated landscaping service today to secure your spot.
Best Landscapers in Las Vegas: Unique Challenges Require Expert Solutions
Scorching summers, strict water rules, and alkaline desert soils make Las Vegas landscaping a specialized craft. Acting now — before peak heat — matters: hire a qualified landscaping company that knows local codes and plant survival tactics to protect your investment.
Why Las Vegas Demands Specialized Landscaping Knowledge
Las Vegas and the surrounding areas present hard limits for ordinary yards. Local landscapers must handle conditions like:
Extreme summer heat (local highs commonly exceed 100°F; record peaks approach mid-110s)
Low annual rainfall—very limited natural water supply
Mandatory water conservation rules and rebate programs
Rocky, alkaline soils that need amendment for plant health
Frequent high winds that can scour young plantings and shift mulch
Because of that, the best landscaping companies in Las Vegas focus on skills that actually work here:
Selecting desert-adapted plant palettes that minimize irrigation needs
Designing and installing water-efficient irrigation (drip, micro-spray, smart controllers)
Soil improvement and proper planting techniques for longer-term health
Strategic shade, windbreaks, and hardscape placement to reduce evaporation
Durable hardscaping and turf solutions (including artificial turf where appropriate) that stand up to our climate
Why Professional Landscapers Are Essential in Las Vegas
Water Conservation Expertise
Save water — and money. Local landscapers design systems that cut unnecessary irrigation: drip lines, smart controllers, hydrozoning and properly grouped plantings can slash water waste (many local projects report big reductions). Ask about SNWA rebate-eligible upgrades and irrigation audits before you sign.
Desert Plant Knowledge
Plants that actually thrive here. The best landscapers Las Vegas pick drought-tolerant, low-debris species and place them for long-term survival. That means less replacement, less pruning, and fewer pest problems — whether you want natural desert plantings or synthetic grass and artificial turf where it makes sense.
Compliance with Local Regulations
Avoid fines and wasted water. Professional landscaping experts keep up with local water restrictions, permit rules, and best practices for lawn care across Las Vegas and surrounding areas. That compliance protects your property and can unlock rebate programs for water-efficient upgrades.
Long-Term Cost Savings
Stop paying for avoidable replacements. Professional landscaping installation reduces long-term costs: fewer plant failures, lower water bills, and durable hardscape or turf installations. Homeowners often see measurable utility savings after a full-season tune-up and xeriscape conversion.
Property Value Enhancement
Boost curb appeal and resale value. Thoughtful desert landscape increases perceived home value — buyers in Las Vegas favor established, low-water yards. A clean, water-smart front yard can be a decisive selling point in local listings and reviews.
Time and Effort Savings
Let pros handle the heavy lifting. From landscape design to installation to seasonal lawn maintenance, a qualified professional landscaping Las Vegas company saves you hours of work and costly trial-and-error. They handle irrigation checks, lawn care items like weed pulling and bush trimming, and routine tree trimming so you don’t have to.
Essential Criteria for Selecting the Best Landscapers in Las Vegas
Credentials and Licensing
Before you hire any professional landscaping company in Las Vegas, verify these must-have credentials to protect yourself and your property:
Valid Nevada State Contractors License (C-10 for landscape contracting) — confirm status on the Nevada State Contractors Board site
Local business license from Clark County or the City of Las Vegas
Liability insurance and workers’ compensation — ask for certificates
Southern Nevada Water Authority (SNWA) Water Smart Contractor or equivalent water-efficiency credentials
Memberships in industry groups such as the Nevada Landscape Association or other professional landscaping organizations
“Always verify a landscaper’s license status through the Nevada State Contractors Board website. This simple step can protect you from unqualified contractors and potential liability issues.”
– Nevada State Contractors Board
Experience with Desert Landscaping
Experience in any climate doesn’t equal desert experience. Look for proven Las Vegas expertise:
Minimum 3–5 years of hands-on experience in Las Vegas, or similar desert regions
Portfolio that highlights xeriscape, low-water landscape design, and long-term project survival
Demonstrated knowledge of xeriscaping principles, hydrozoning, and plant palettes suited to our heat
Soil amendment experience — working with rocky, alkaline soils and improving long-term fertility
Awareness of local microclimates and placement strategies for shade, wind protection, and water conservation
Don’t Risk Your Landscape Investment
Free consultations and spring installation slots fill quickly. Connect with an experienced landscaping service that understands local rules and plant survival.
Review a contractor’s work closely. A strong portfolio shows quality, style, and real-world durability:
Look for clear before-and-after photos and project descriptions
Check for properties similar to yours (front yard, small yards, residential commercial) to assess fit
Confirm projects have stood up to at least one full Las Vegas summer — ask for age of installation
Ask to see examples of water-efficient solutions and irrigation plans they installed
Request both newly installed projects and mature landscapes to evaluate longevity
Customer Reviews and References
Real reviews and direct references reveal performance on quality, timeliness, and service:
When vetting reviews and references:
Check multiple platforms — Google, Houzz, Angi, Yelp — for consistent ratings and recent activity
Look specifically for comments about desert landscaping knowledge, irrigation performance, and lawn maintenance follow-through
Note how the company responds to negative reviews — professional responses matter
Ask for references from clients with projects at least a year old and call them with a short script
Script suggestion: “How has the landscape held up through summer? Any irrigation issues? Was the lawn maintenance company responsive?”
Pricing Transparency — What a Clear Estimate Looks Like
The right company provides a written, line-item estimate and explains trade-offs:
Itemized costs for materials (plants, turf or synthetic grass, rock, pavers, retaining wall materials), labor, and irrigation equipment
Clear payment schedule and milestones tied to project phases
Disclosure of potential additional costs (soil import, unforeseen grading, repairs)
Information about SNWA rebates or incentives for water-efficient upgrades
Willingness to offer phased options (design only, install only, lawn maintenance packages) for residential commercial needs
Warning: Extremely low bids are a red flag. In Las Vegas, cut-rate estimates often lead to inferior materials, improper irrigation, or plants that won’t survive our climate — costing you far more over time.
What Is Landscape Maintenance and Why It Matters in Las Vegas
Landscape maintenance in Las Vegas goes far beyond mowing and basic pruning. In our desert climate, professional lawn maintenance is the difference between a durable, water-smart yard and constant repair bills — from irrigation tune-ups to drought-proof plant care. Local landscaping companies offer tailored plans for homes and commercial properties across Las Vegas, North Las Vegas, and surrounding areas to protect your investment year-round.
Essential Components of Las Vegas Landscape Maintenance
Regular Maintenance Tasks
Irrigation system checks and adjustments (recommended monthly in peak season; quarterly in cooler months) — includes leak detection and controller programming
Pruning and shaping desert plants on species-specific schedules to reduce stress and debris
Weed control and targeted weed pulling in rock and mulch zones to prevent water competition
Fertilization with desert-appropriate formulas, applied at the right season for best results
Pest monitoring and timely treatment to prevent infestations that can decimate drought-tolerant plants
Seasonal Lawn Maintenance Requirements
Spring: Full irrigation audit, sprinkler head adjustments or drip repairs, and pre-summer plant health checks
Fall: Gradual irrigation reduction, pruning of summer growth, and prepping sensitive species
Winter: Frost protection for vulnerable plants and removal of debris that can trap cold air
“Professional landscape management in Southern Nevada can significantly reduce water use and extend plant life when done correctly — talk with your local water authority about rebate programs and recommended practices.”
– Southern Nevada Water Authority
Maintenance Plan Example — What to Expect
Here’s a sample plan so you can compare proposals:
Monthly Plan (peak season): 1 visit/month — irrigation check, weed control, pruning touch-ups, and a one-page report.
Quarterly Plan (lawn maintenance yards): 1 visit/3 months — seasonal system check, plant health review, and preventative treatments.
Common Emergency Issues and Response Times
Irrigation leaks — immediate response recommended; ask prospective companies how quickly they dispatch repairs (same-day or 24–48 hours).
Sudden plant decline or pest outbreaks — expect clear escalation and remediation plans with defined timelines.
Storm or wind damage — verify who handles debris removal and urgent repairs as part of property maintenance landscaping services.
Questions to Ask About Maintenance Services
Before you sign, get these answers in writing:
Do you offer a customized maintenance landscaping schedule based on my landscape’s plant choices and irrigation type?
What exactly is included in irrigation system checks and adjustments? (Ask for controller make/model familiarity.)
How do you handle seasonal transitions and emergency repairs — response times and pricing?
Will I receive detailed reports after visits listing actions taken and recommendations?
Can you handle turf care, artificial turf upkeep, tree trimming, bush trimming, pressure washing, gutter cleaning, and other property maintenance tasks if needed?
Protect Your Landscape Investment
Slots for summer prep fill fast — schedule your maintenance landscaping consultation now to secure timely irrigation audits and summer-proofing. Professional maintenance keeps your Las Vegas landscape healthy and lowers long-term repair costs.
How to Design a Small Front Yard Landscape in Las Vegas
Small front yards in Las Vegas are prime opportunities to create high-impact, water-efficient designs that reduce maintenance and increase curb appeal. A professional landscapers can convert tight spaces into functional, drought-tolerant displays using smart design, targeted plant selection, and resilient materials like artificial turf or engineered rock.
Design Principles for Small Las Vegas Front Yards
Focal Point Creation
Choose one strong focal point — a specimen cactus, a sculptural boulder, or a compact poolside fire feature — to anchor the space and draw the eye without overcrowding.
Vertical Elements
Use trellises, narrow trees, or vertical planters to add height and depth without sacrificing ground area. This technique makes a small front yard feel larger while preserving usable turf or seating zones.
Defined Spaces
Divide the yard into purposeful zones—entry path, seating, planting bed—using changes in material, low retaining walls, or curving pathways. Defined spaces create a sense of scale and order in compact yards.
Small Front Yard Success Elements
Plant Selection for Small Spaces
Pick compact, low-water desert plants that fit the scale and require minimal pruning
Mix textures and heights for year-round interest without heavy maintenance
Choose species with minimal leaf-drop to reduce debris and maintenance time
Hydrozone plant groups by water needs to optimize irrigation efficiency
Hardscaping for Small Front Yards
Use permeable paving and decorative rock to cut water use while maintaining style
Curved paths and staggered materials create visual distance in small yards
Multi-use elements—seating walls or planters that double as barriers—maximize function
Consider a compact retaining wall to add elevation, definition, and planting pockets
Water-Efficient Irrigation for Small Spaces
Professionals install irrigation solutions tailored to compact layouts:
Micro-drip and targeted emitters that deliver water directly to root zones
Smart controllers that reduce run-time based on weather and season
Hydrozoning to group plants with similar needs for precise watering
Small-scale rainwater capture elements where feasible
Careful grading to ensure water reaches plantings, not driveways
Small Yard Quick Plan (Example for a 400–600 sq ft front yard)
Site visit and quick survey — identify microclimates, shade, and views (1 hour)
Concept design — pick a focal point, define zones, and choose a drought-tolerant palette (2–3 days)
Materials and irrigation plan — include options for artificial turf or synthetic grass vs. drought-tolerant plantings
Install phase — grading, irrigation, hardscape, plantings (2–5 days depending on scope)
Initial maintenance check and irrigation tuning at 30 days
Pro Tip: As a rule of thumb, many Las Vegas designers recommend about 70% hardscaping and 30% planted areas in very small front yards to maximize visual impact and minimize water use — but your design should match your landscaping needs and lifestyle.
Ask local landscapers about front yard packages and fast-install options — many companies offer spring availability for quick installs before peak summer heat. Adding small features like a pool fire feature or low-profile lighting can dramatically increase curb appeal with minimal water impact when planned by years experience designers.
Essential Questions to Ask Before Hiring Best Landscapers Las Vegas
What percentage of your projects are desert or xeriscape designs?
Top Las Vegas landscapers typically focus heavily on xeriscape and low-water projects—look for companies where 70–80% of their portfolio reflects desert-specific work. That level of specialization indicates real experience with local soils, heat, and water rules.
How do you address water conservation in your designs?
Expect detailed answers: drip or micro-drip layouts, smart controllers, hydrozoning, sensor-based scheduling, and SNWA rebate-aware upgrades. Ask for examples showing irrigation run-times before and after retrofits—concrete information beats vague promises.
What warranties and post-installation support do you provide?
Good companies provide clear warranties—often 1–2 years on plants (with proper care) and longer guarantees on hardscape and irrigation equipment. Also confirm post-installation response times for repairs (irrigation leaks, plant failures) and whether they offer ongoing maintenance packages or one-off repairs.
How quickly do you respond to emergencies like irrigation leaks or sudden plant decline?
Ask for their emergency protocol: target response windows (same-day, 24–48 hours), escalation steps, and whether emergency repairs are included in maintenance plans. Fast action on leaks prevents wasted water and property maintenance damage—insist on written response commitments.
What maintenance will my new landscape require?
Honest landscapers provide a realistic schedule (monthly, biweekly, or seasonal) tailored to your plant palette, irrigation type, and yard size. They should explain lawn care, bush trimming, tree trimming, weed pulling, and whether they handle additional property tasks like gutter cleaning, pressure washing, or power washing.
Can you provide a detailed breakdown of costs and phased options?
Reputable companies supply itemized estimates listing materials (plants, turf or synthetic grass, pavers, retaining wall materials), labor, irrigation components, and a clear payment schedule. Ask for phased options—design-only, install-only, or install plus ongoing maintenance—to fit your budget and timeline.
Ready to Transform Your Las Vegas Landscape?
Don’t wait—top landscapers and maintenance companies in Las Vegas, and surrounding areas book fast for spring. Check recent reviews on Google, Angi, Houzz and Yelp, then call or click to reserve a limited consultation slot.
Top-rated landscaping professionals serving the greater Las Vegas area — click the map to see hours, reviews, and directions for nearby landscaping companies offering turf, lawn care, gutter cleaning and full property services.
Take Action Now for Your Desert Oasis
Creating a beautiful, sustainable landscape in Las Vegas takes local expertise. The best landscapers Las Vegas understand heat, water rules, and soil challenges — they install outdoor spaces that save water, reduce maintenance, and increase your home’s curb appeal across Las Vegas and surrounding areas.
Don’t gamble with inexperienced contractors. Hire a licensed, review-backed landscapers that offers clear pricing, post-installation support, and maintenance plans so your investment thrives year after year.
Save water and cut utility bills with smart irrigation and xeriscape.
Protect your property with durable materials, proper grading, and compliant installations.
Enjoy more free time — hand off lawn care, bush trimming, and routine maintenance to professionals.
Your Desert Oasis Awaits
Limited spring installation and maintenance slots — act now before summer. Check local reviews, then book a free consultation to lock in your preferred start date.
Landscape Lighting Installation: The Complete Guide to Illuminating Your Outdoor Space
Transforming your outdoor living space with landscape lighting creates a dramatic difference in both the appearance and functionality of your property. A well-designed lighting system enhances architectural features, improves safety along pathways, deters potential intruders, and extends your outdoor living hours well into the evening. This comprehensive guide walks you through everything you need to know about landscape lighting installation, from planning and selecting fixtures to wiring techniques and maintenance tips.
Benefits of Landscape Lighting
Installing landscape lighting offers multiple advantages that extend beyond simple illumination. Understanding these benefits helps you make informed decisions when planning your lighting design.
Aesthetic Enhancement
Well-placed landscape lighting dramatically enhances your property’s visual appeal. Strategic lighting can highlight architectural features, showcase prized plantings, and create depth and dimension in your landscape that disappears after dark. The right lighting transforms ordinary spaces into extraordinary nighttime environments.
Safety and Security
Properly installed landscape lighting improves navigation along walkways, steps, and other potential hazards after dark. Beyond safety, a well-lit property serves as an effective deterrent against intruders who typically prefer to operate in darkness. Motion-activated security lights can provide additional protection for vulnerable areas.
Extended Outdoor Living
Landscape lighting extends the usability of your outdoor spaces well beyond sunset. Patios, decks, and garden areas become functional nighttime entertainment spaces with the right lighting design. This effectively increases your home’s livable square footage during evening hours.
Increased Property Value
A professionally designed landscape lighting system can significantly boost your property’s curb appeal and market value. Potential buyers are often willing to pay a premium for homes with thoughtfully designed outdoor lighting that enhances both beauty and functionality.
Types of Landscape Lighting Fixtures
Selecting the right fixtures for your landscape lighting installation is crucial for achieving your desired effect. Each fixture type serves a specific purpose in your overall lighting design.
Path Lights
Path lights are among the most common landscape lighting fixtures, designed to illuminate walkways, garden paths, and driveways. Typically mounted on stakes and standing 14-24 inches tall, these fixtures cast light downward to ensure safe navigation while creating a welcoming atmosphere.
Spotlights & Floodlights
Spotlights project a narrow, focused beam to highlight specific features like trees, statues, or architectural elements. Floodlights cast a wider beam to illuminate larger areas such as walls or garden beds. Both can be adjusted to achieve different lighting effects.
Well Lights
Well lights (also called in-ground lights) are installed flush with the ground surface, making them nearly invisible during daylight hours. These fixtures project light upward and are ideal for illuminating walls, columns, and tall landscape features without the fixture being visible.
Step & Deck Lights
These specialized fixtures are designed to be mounted on vertical surfaces of steps, stairs, or deck risers. They provide crucial illumination for safety while maintaining a subtle, unobtrusive appearance that complements your hardscape design.
Hardscape Lights
Hardscape lights are specifically designed to mount directly to outdoor structures like retaining walls, pillars, and under capstones. These low-profile fixtures create a wash of light across surfaces without being visually prominent themselves.
Specialty Fixtures
This category includes underwater lights for ponds and fountains, string lights for festive areas, and bollard lights for more substantial pathway illumination. Each serves specific decorative or functional purposes in your landscape lighting design.
Landscape Lighting Techniques and Design Principles
Understanding basic lighting techniques helps you create a more dynamic and professional-looking landscape lighting installation. These methods can be combined to create a cohesive lighting design that highlights your property’s best features.
Uplighting
Uplighting involves positioning fixtures at ground level to cast light upward onto features like trees, walls, or architectural elements. This technique creates dramatic shadows and highlights textures, making it ideal for showcasing the vertical elements in your landscape.
Downlighting
Also called moonlighting when installed in trees, downlighting positions fixtures above the area to be illuminated, casting light downward. This creates a natural-looking effect that mimics moonlight filtering through branches, producing gentle, dappled shadows on the ground below.
Silhouetting
This technique places lights between a feature and a wall or flat surface, creating a dramatic silhouette effect. The light washes the background while the foreground object appears as a dark outline, emphasizing its distinctive shape and form.
Cross Lighting
Cross lighting uses multiple fixtures positioned at different angles to illuminate a feature from several directions. This reduces harsh shadows and ensures the subject is well-lit from all viewing angles, making it ideal for focal points in your landscape.
Design Principle: Layering Light
Professional landscape lighting designs typically incorporate multiple lighting techniques in layers. Combine ambient lighting (overall illumination), task lighting (functional illumination of specific areas), and accent lighting (highlighting features) to create depth and visual interest throughout your outdoor space.
Planning Your Landscape Lighting Installation
Proper planning is essential for a successful landscape lighting installation. Taking time to develop a comprehensive plan helps avoid costly mistakes and ensures your lighting system meets your needs.
FREE PRICING ESTIMATOR
Get a clear, custom estimate for your landscaping project in just a few minutes. Answer a few simple questions and receive a tailored cost breakdown based on your property, materials, and design goals.
Start by walking your property at night with a flashlight to identify areas that would benefit from lighting. Take photos and make notes about specific features you want to highlight. Sketch a rough layout of your property and mark potential fixture locations, considering both aesthetic and functional needs.
Essential Planning Steps:
Identify key features to highlight (trees, architecture, garden areas)
Mark pathways and areas requiring safety lighting
Note existing outdoor electrical outlets
Determine transformer locations based on outlet access
Calculate total wattage requirements for your system
Plan wire routes that minimize visibility and trenching
Consider future expansion possibilities
Understanding Power Requirements
Most residential landscape lighting uses low-voltage systems (typically 12 volts) that require a transformer to convert standard 120-volt household current. Calculate your power needs by adding the wattage of all fixtures, then multiply by 1.25 to account for voltage drop over distance. This total determines the transformer size you’ll need.
“The most common mistake in DIY landscape lighting installation is underestimating power requirements. Always size your transformer with room for future expansion.” ~Professional Landscape Lighting Designer
Landscape Lighting Installation Process
With proper planning complete, you’re ready to begin the installation process. Follow these steps for a successful landscape lighting installation that will enhance your property for years to come.
Step-by-Step Installation Guide
Gather supplies and tools – Collect all fixtures, transformer, wire, connectors, and tools before starting.
Mark underground utilities – Contact your local utility marking service to identify and mark underground lines before digging.
Position and assemble fixtures – Place fixtures according to your plan and assemble following manufacturer instructions.
Mount the transformer – Install the transformer near an outdoor GFCI outlet, typically 12-18 inches above ground level.
Lay out main cable – Run low-voltage cable from the transformer to each fixture location, following your planned route.
Connect fixtures to cable – Use waterproof connectors to attach each fixture’s lead wire to the main cable.
Bury the cable – Create a shallow trench (3-6 inches deep) and bury the cable to protect it from damage.
Connect to transformer – Attach the main cable to the transformer following manufacturer instructions.
Test the system – Turn on the transformer and verify all fixtures are working properly.
Adjust fixture positioning – Fine-tune the angle and direction of each fixture after dark for optimal effect.
Wiring Techniques for Reliable Connections
Proper wiring is crucial for a reliable landscape lighting installation. Use waterproof wire connectors specifically designed for outdoor use to ensure connections remain secure despite exposure to moisture and temperature fluctuations. For most residential installations, 12-gauge or 14-gauge direct burial cable is sufficient.
Main Wiring Methods:
Daisy Chain – Connect fixtures in sequence along a single cable run
T-Connection – Branch secondary cables from the main cable to reach distant fixtures
Hub System – Run multiple cables directly from the transformer to different zones
Wiring Tips:
Leave extra slack at connections for future adjustments
Use waterproof wire nuts or gel-filled connectors
Avoid sharp bends in cable that could damage insulation
Keep connections accessible for future maintenance
Energy-Efficient Landscape Lighting Options
Modern landscape lighting installations can be both beautiful and energy-efficient. Selecting the right components helps minimize energy consumption while maximizing lighting effectiveness.
LED Lighting
LED fixtures have revolutionized landscape lighting installation. They consume up to 80% less energy than traditional halogen lights while lasting 15-20 times longer. Modern LEDs offer warm color temperatures that create inviting ambiance without the harsh blue tint of early LED technology.
Solar-Powered Options
Solar landscape lighting eliminates the need for wiring and transformers, making installation extremely simple. While generally less bright than wired systems, modern solar fixtures can provide adequate illumination for paths and accent lighting in areas with good sun exposure.
Smart Controls
Smart lighting controls allow you to program operating schedules, adjust brightness levels, and even change color with compatible fixtures. Many systems offer smartphone control and integration with home automation platforms for convenient management of your landscape lighting.
Energy-Saving Tips for Landscape Lighting Installation
Use timers or photocells to ensure lights operate only when needed
Consider motion sensors for security lighting in less-frequented areas
Implement zoning to illuminate different areas at different times
Select fixtures with appropriate light output to avoid over-lighting
Use warm white LEDs (2700K-3000K) for energy efficiency with pleasant ambiance
Maintenance and Troubleshooting
Regular maintenance ensures your landscape lighting installation continues to perform optimally year after year. Understanding common issues and their solutions helps you quickly resolve problems when they arise.
Routine Maintenance Tasks
Establish a regular maintenance schedule to keep your landscape lighting system in top condition. Quarterly inspections are typically sufficient for most installations, with more frequent checks during fall when leaf debris can accumulate around fixtures.
Clean fixture lenses to remove dirt and debris
Trim vegetation that may block light or damage fixtures
Check and tighten wire connections
Verify transformer settings and timer operation
Replace bulbs proactively in non-LED systems
Adjust fixture positioning as plants grow and landscapes evolve
Common Troubleshooting Issues
Even well-installed landscape lighting systems can experience occasional problems. Knowing how to diagnose and fix common issues saves time and frustration.
Fixture Not Lighting
Check for loose connections at the fixture and transformer. Verify the bulb is functioning and properly seated. Test voltage at the fixture to ensure power is reaching it.
Dim or Flickering Lights
Often caused by voltage drop over long cable runs or overloaded transformers. Verify transformer capacity is sufficient for connected fixtures. Consider adding a larger gauge wire or additional transformer for extensive systems.
Water in Fixtures
Check seals and gaskets for damage. Ensure fixtures are properly oriented to drain water. Replace damaged components or entire fixtures if seals cannot be restored.
Professional Installation vs. DIY Considerations
Deciding whether to tackle landscape lighting installation yourself or hire a professional depends on several factors including your skill level, project complexity, and available time.
DIY Installation Advantages
Cost savings on labor (typically 40-60% of project cost)
Flexibility to work at your own pace
Personal satisfaction of completing the project
Intimate knowledge of your system for future maintenance
Ability to make adjustments and additions over time
Professional Installation Advantages
Expert design knowledge and experience
Access to professional-grade fixtures and equipment
Proper handling of complex electrical requirements
Time savings (typically 1-3 days vs. 1-2 weekends DIY)
Warranty coverage on both products and installation
When to Consider Professional Installation
While many homeowners successfully install landscape lighting themselves, certain situations warrant professional assistance. Consider hiring a pro if your project involves any of these elements:
Installation in difficult terrain or established landscaping
Integration with existing irrigation or electrical systems
High-voltage lighting components requiring licensed electrical work
Large properties requiring multiple transformers or extensive wiring
Get a Professional Consultation
Not sure if DIY is right for your project? Our lighting experts can assess your needs and provide personalized recommendations. Schedule a free, no-obligation consultation today.
Safety should be your top priority during landscape lighting installation. Following proper procedures and adhering to relevant codes helps ensure a safe installation process and reliable system operation.
Critical Safety Guidelines
Always turn off power before working on electrical connections
Use GFCI-protected outlets for all landscape lighting transformers
Call utility locating services before digging to mark underground lines
Use only UL-listed outdoor-rated equipment and materials
Follow manufacturer instructions for all components
Keep connections above potential flood levels when possible
Electrical Code Considerations
While low-voltage landscape lighting typically has fewer code requirements than line-voltage systems, you should still be aware of relevant regulations. Most areas follow the National Electrical Code (NEC), which includes specific provisions for landscape lighting installation.
Code Requirement
Description
Compliance Tips
Transformer Location
Must be at least 12″ above ground level and protected from weather
Mount transformer on exterior wall under eave or use weatherproof enclosure
Cable Burial Depth
Low-voltage cable typically requires 6″ burial depth (varies by jurisdiction)
Check local codes; use direct burial cable rated for underground use
GFCI Protection
Required for all outdoor outlets powering landscape lighting
Install GFCI outlet or breaker if not already present
Fixture Clearances
Minimum distances from pools, spas, and water features
Use specifically rated fixtures for wet locations near water
Cost Factors and Budgeting for Landscape Lighting
Understanding the cost components of landscape lighting installation helps you create a realistic budget for your project. Costs vary widely based on system size, component quality, and installation complexity.
Typical Cost Components
Component
Budget Range
Mid-Range
Premium
Path Lights (each)
$15-30
$30-75
$75-200+
Spotlights (each)
$20-40
$40-100
$100-250+
Well Lights (each)
$25-50
$50-120
$120-300+
Transformer
$75-150
$150-300
$300-600+
Cable (100 ft)
$30-60
$60-100
$100-200+
Professional Installation
$200-500
$500-1,500
$1,500-5,000+
Budgeting Tips
Create a realistic budget for your landscape lighting installation by considering these practical tips from lighting professionals:
Start with high-priority areas if budget is limited (entry, pathways, key features)
Invest in quality fixtures for frequently viewed areas; budget options may work for secondary locations
Purchase a transformer with 20% more capacity than currently needed to allow for future expansion
Consider the long-term energy savings of LED fixtures despite higher initial cost
Plan installation in phases if necessary, starting with essential safety lighting
“It’s better to do a smaller landscape lighting installation with quality components than to compromise on materials to cover a larger area. You can always expand the system later.”
~ Landscape Lighting Designer
Seasonal Considerations and Weatherproofing
Your landscape lighting installation must withstand changing seasons and weather conditions. Proper planning and component selection ensure year-round performance regardless of climate challenges.
Weatherproofing Essentials
Quality landscape lighting is designed for outdoor use, but taking additional weatherproofing steps extends system life and reliability. Pay special attention to connections, which are often the most vulnerable points in any lighting system.
Use direct burial cable with UV-resistant coating
Select fixtures with appropriate IP (Ingress Protection) ratings
Apply silicone dielectric grease to connection points
Position transformers in protected locations
Use waterproof wire connectors designed for outdoor use
Seasonal Maintenance Schedule
Adapt your maintenance routine to address seasonal challenges that affect landscape lighting performance. Regular attention prevents most common problems before they develop into system failures.
Spring: Clean fixtures, check for winter damage, adjust timers for longer daylight
Summer: Trim vegetation around fixtures, check for irrigation interference
Fall: Clear leaves and debris, prepare system for winter, adjust timers
Winter: Check for snow/ice accumulation, protect exposed connections
Climate-Specific Considerations
Different climates present unique challenges for landscape lighting installation. Adapt your approach based on your local conditions to ensure optimal performance year-round.
Cold Climate Tips
In areas with freezing temperatures, frost heave can push fixtures out of position and damage wiring. Install fixtures on compacted gravel bases and use flexible wire loops at connections to accommodate ground movement. Consider using brass or copper fixtures that withstand freeze-thaw cycles better than plastic alternatives.
Hot Climate Tips
Extreme heat can degrade wire insulation and plastic components. Route cables in shaded areas when possible and use fixtures with heat-dissipating designs. Select transformers with thermal protection and install them in ventilated locations away from direct sun exposure to prevent overheating.
Coastal Climate Tips
Salt air rapidly corrodes standard metal fixtures. Invest in marine-grade stainless steel or solid brass fixtures specifically designed for coastal environments. Apply corrosion inhibitors to connection points and consider upgrading to sealed, potted LED fixtures that completely isolate electrical components from moisture.
Bringing Your Landscape Lighting Vision to Life
A thoughtfully designed and properly installed landscape lighting system transforms your outdoor space, enhancing both beauty and functionality. Whether you choose to tackle installation yourself or hire a professional, understanding the fundamentals of landscape lighting helps you make informed decisions that result in a system you’ll enjoy for years to come.
Remember that landscape lighting installation is both an art and a science. The technical aspects ensure reliable operation, while the creative elements determine how effectively your lighting enhances your property’s unique features. Take time to experiment with different lighting techniques and fixture placements to discover the perfect combination for your home.
Ready to Transform Your Outdoor Space?
Our landscape lighting experts can help you design and install the perfect lighting system for your property. From initial consultation to final adjustments, we’ll guide you through every step of the process.
How to choose the best park splash pad in Las Vegas
What if you could beat the desert heat without a pool membership or expensive tickets? Las Vegas summers bring extreme temperatures, often soaring above 100°F. Families seek relief from this intense weather, and visiting the best splash pads in Las Vegas is one of the easiest and most affordable ways to stay cool.
When looking for the best splash pads, families can find many options that provide fun and relaxation during the hot summer months. Visiting the best splash pads is a fantastic way to cool down and enjoy quality time together.
Public facilities in the area offer free water play areas. These spots provide a safe, fun way to cool down.
The water used is recycled and treated, just like home tap water. It goes through treatment plants before reuse.
This guide will help you find great options in the region. It covers locations, what to bring, and safety tips.
Enjoy a refreshing escape during the hottest time of year.
Understanding Las Vegas Splash Pads and Their Benefits
These water play areas offer families a refreshing escape from the desert climate. They provide cooling relief without requiring expensive memberships or tickets.
The best splash pads are designed specifically for families, offering various interactive water features that keep children entertained.
What Makes Splash Pads Ideal for Vegas Summers
Choosing one of the best splash pads ensures a fun, engaging experience for your kids, making hot days enjoyable.
Interactive water playgrounds feature sprinklers that spray from all directions. They create engaging environments where children can play and cool down.
These facilities operate from 8 am to 10 pm starting in early May. Morning and evening visits help families avoid peak heat hours.
Design variations include spraying animals, geysers, and water cannons. Different features cater to various age groups from toddlers to older children.
Water Safety and Recycling Systems
The water used in these play areas undergoes thorough recycling processes. It drains to treatment plants before reaching Lake Mead and returning through pipes.
Parents should remind children that this water isn’t for drinking. The recycling system mirrors home water treatment methods for safety.
These sustainable practices align with city maintenance standards. They ensure clean, environmentally responsible water play areas throughout the region.
Free access makes these spots popular family destinations. They offer safe environments without the commitment of full water parks.
Essential Items to Bring to Best Splash Pads
For a successful outing, packing essentials for the best splash pads in las vegas is crucial to keep everyone comfortable and safe.
Proper preparation ensures a smooth and enjoyable experience at water play areas. Having the right gear makes all the difference for family outings.
Smart planning helps everyone stay comfortable and safe. It also maximizes the fun during your visit time.
Hydration and Sun Protection
Drinking water is absolutely essential in the desert climate. The intense heat can quickly lead to dehydration.
Pack plenty of cold water for everyone. Reusable bottles work well for this purpose.
Healthy snacks maintain energy levels during active play. Fresh fruit, granola bars, and sandwiches are excellent choices.
Sun protection prevents painful burns and long-term damage. Apply waterproof sunscreen before leaving home.
Reapply sunscreen every two hours during your stay. Wide-brimmed hats and sunglasses provide additional protection.
Safety and Comfort Gear
Proper footwear prevents accidents on wet surfaces. Water shoes with good grip offer the best traction.
At the best splash pads in las vegas, parents can relax knowing their children are safe while enjoying the water play area.
They protect feet from hot pavement and rough surfaces. This is especially important for active children.
Swim diapers are mandatory for babies and toddlers. They help maintain cleanliness and hygiene standards.
Bring large towels for drying off after water play. A complete change of clothes ensures comfort for the ride home.
A waterproof bag keeps wet items separate from dry belongings. The Ikea blue bag is a popular choice for this purpose.
Category
Essential Items
Purpose
Hydration
Water bottles, snacks
Prevent dehydration and maintain energy
Sun Protection
Sunscreen, hats, sunglasses
Shield from UV rays and prevent burns
Footwear
Water shoes with grip
Prevent slips and protect feet
Hygiene
Swim diapers
Maintain cleanliness for young children
Comfort
Towels, change of clothes
Ensure dryness after water activities
Storage
Waterproof bag
Keep wet and dry items separated
These items help create a safe and enjoyable experience. They follow recommended practices for outdoor water activities.
Proper preparation makes visits to pads in the city more rewarding. Families can focus on having fun together.
The right gear ensures everyone stays comfortable throughout the day. It transforms a simple outing into a memorable adventure.
Best Splash Pads in Las Vegas Proper
Each of the best splash pads in las vegas features unique attractions that cater to all ages, ensuring a memorable family outing.
Families seeking cooling fun will find excellent options throughout the metropolitan area. These locations offer refreshing escapes during warm months.
The city maintains 28 different parks with water features. Each location has unique designs and play elements.
All-American Park
This family-friendly destination sits at 1551 S. Buffalo Drive. It’s conveniently located near Oakey Boulevard.
Children enjoy various spraying features and interactive elements. The environment remains accessible for all age groups.
Parents appreciate the shaded seating areas nearby. They can watch kids play while staying comfortable.
Centennial Hills Park
Find this popular spot at 7101 N. Buffalo Drive. It’s situated south of Elkhorn Road.
The water area includes unique geysers and spray cannons. These features create exciting play experiences.
Ample parking and restroom facilities add convenience. Visitors often spend several hours here.
Lorenzi Park
This location occupies 3333 W. Washington Avenue. It’s close to Rancho Drive for easy access.
Multiple water activities engage children of different ages. Gentle sprays work well for younger visitors.
The surrounding green space offers picnic opportunities. Families can make a full day of their visit.
Park Name
Address
Notable Features
Nearby Landmarks
All-American Park
1551 S. Buffalo Drive
Interactive sprays, shaded seating
Oakey Boulevard
Centennial Hills Park
7101 N. Buffalo Drive
Geysers, water cannons
Elkhorn Road
Lorenzi Park
3333 W. Washington Ave
Age-appropriate water activities
Rancho Drive
All these facilities operate free of charge. They provide cost-effective cooling options during hot weather.
Families looking to enjoy some fun under the sun should definitely check out the best splash pads in las vegas for their next adventure.
The city ensures regular maintenance and cleanliness standards. Water quality and safety remain top priorities.
These destinations represent just a sample from the complete list. Many other parks offer similar refreshing experiences.
Top Henderson Splash Pad Locations
Henderson provides excellent cooling options with numerous water play areas. The city maintains 18 different facilities for public enjoyment.
Henderson’s best splash pads in las vegas offer a great escape from the heat, perfect for families looking to cool off.
These locations offer free access during summer months. They provide safe environments for family fun.
Paseo Vista Park
This popular spot sits at 2505 Paseo Verde Parkway. It features multiple interactive water sprays and geysers.
Children enjoy the varied water elements designed for different ages. Shaded seating areas allow parents to watch comfortably.
The park includes additional playground equipment beyond the water features. It represents one of the favorite splash pad locations in Henderson.
Water Street Plaza
Located at 240 S. Water Street, this downtown destination offers convenience. Its central position makes it ideal for visitors exploring the area.
The water play area complements the urban environment perfectly. Families can combine shopping and dining with cooling off.
This location typically sees lighter crowds during weekday mornings. Early visits provide more space for play.
Reunion Trails Park & Amargosa Trailhead
Find this dual-purpose facility at 44 Chapata Drive. It serves as both a water play area and hiking trail access point.
The splash pad amenities here attract families seeking combined activities. Visitors can enjoy water fun then explore nature trails.
This park amargosa trailhead location offers unique recreational opportunities. It stands out among Henderson’s splash pads open to the public.
All Henderson facilities maintain high cleanliness standards. The city las vegas area benefits from these well-maintained spaces.
Morning hours typically offer smaller crowds and cooler temperatures. These times provide optimal visiting conditions during summer.
The variety of options ensures families can find their perfect spot. Henderson’s commitment to public recreation shines through these facilities.
North Las Vegas Splash Pad Destinations
There are many options available among the best splash pads in las vegas that ensure safe and enjoyable experiences for children.
Families in the northern region have access to several refreshing water play areas. These facilities provide excellent cooling options during warm weather.
Six different parks feature interactive water features in this area. They offer free access and maintain high cleanliness standards.
Each location provides unique experiences for children and parents. The city ensures proper maintenance and water safety protocols.
Tropical Breeze Park
This popular destination sits at 1505 E. Tropical Parkway. It’s conveniently located near Bruce Street and El Campo Grande Avenue.
The water play area features multiple spraying elements and interactive features. Children enjoy the variety of water activities available.
Nearby amenities include shaded seating and traditional playground equipment. Families can combine water fun with other recreational activities.
Aliante Nature Discovery Park
Find this nature-themed facility at 2627 Nature Park Drive. It’s situated near North Aliante Parkway and Deer Springs Way.
The park combines water play with educational nature elements. Children can enjoy splashing while learning about the environment.
This location offers a family-friendly atmosphere with ample space. It represents one of the more unique water play destinations.
Nicholas Flores Park
This park occupies 4133 Allen Lane north of West Alexander Road. It provides convenient access for residents in the surrounding neighborhoods.
The water features here cater to various age groups and preferences. Gentle sprays work well for younger children while older kids enjoy more active elements.
This location maintains excellent cleanliness and safety standards. It stands as a reliable choice for family outings.
All these facilities operate during summer months without charge. They provide cost-effective cooling solutions for local families.
Morning hours typically offer smaller crowds and more comfortable temperatures. These times work well for avoiding peak heat periods.
The variety across six different parks ensures options for every preference. North Las Vegas demonstrates commitment to community recreation through these facilities.
Summerlin and Southwest Area Splash Pads
The Summerlin and Southwest regions feature outstanding aquatic playgrounds for family enjoyment. These communities maintain excellent water recreation facilities.
The best splash pads are designed not only to cool off but also to foster creativity and play among children.
All locations operate without charge during summer months. They provide cooling relief during warm weather.
Paseos Park
This facility sits at 12122 Desert Moon Road in the southwest area. Its water play zone includes multiple interactive spray features.
Children enjoy geysers that shoot water upward from the ground. Colorful ground sprays create engaging patterns for young visitors.
The park offers shaded seating areas for parents watching children play. Additional playground equipment complements the water features.
Desert Breeze Park
Find this popular destination at 8275 West Spring Mountain Road. The aquatic area features water cannons and rotating sprinklers.
Families appreciate the spacious layout and picnic areas nearby. The park includes traditional playground structures beyond the water zone.
This location sees moderate crowds during weekend afternoons. Morning visits typically offer more space for play.
Goett Family Park
This family-oriented park occupies 10950 Southern Highlands Parkway. Its water play area caters to various age groups.
Gentle ground fountains work well for younger children. Older kids enjoy more active spraying elements throughout the space.
The park maintains excellent cleanliness and safety standards. It represents a favorite destination for local families.
All these facilities operate from morning until evening during summer. Early visits help avoid peak heat hours.
The city ensures regular maintenance and water quality testing. These practices guarantee safe environments for public use.
Each location offers unique features while maintaining high standards. Families can choose based on preferred amenities and proximity.
Safety Tips and Best Times to Visit
Planning your water play adventure requires smart timing and safety awareness. These aquatic playgrounds offer refreshing fun while demanding careful consideration of desert conditions.
Optimal Visiting Hours
Early mornings and late afternoons provide the most comfortable experience. Temperatures typically stay manageable before 10 AM and after 4 PM.
These hours help families avoid extreme heat while still enjoying water activities. The splash pads open during these times offer cooler conditions.
Weekday mornings often see lighter crowds than weekends. This allows more space for children to play freely.
For families wanting to stay cool, the splash pads not city owned are the perfect solution, combining fun and safety in one place.
Heat Safety Considerations
Hydration remains crucial throughout your visit. Drink water before, during, and after playing at these facilities.
Sun protection is essential even when wet. Reapply waterproof sunscreen every two hours for maximum effectiveness.
Watch for signs of heat exhaustion in children. Dizziness, fatigue, or nausea mean it’s time to seek shade immediately.
Remember that the water circulating through these pads isn’t for drinking. The recycling system keeps it clean for play only.
Check weather forecasts before heading out. Plan your visit around cooler temperatures for maximum safety and enjoyment.
Conclusion
Cooling off during scorching summer days becomes an accessible family adventure with these public water facilities.
Overall, the best splash pads in Las Vegas provide an enjoyable escape from the heat, helping local families stay cool without spending a dime.
Municipal splash pads in las Vegas henderson, and North Las Vegas offer free, safe entertainment for kids of all ages—making them a go-to spot for summer fun.
Different locations feature unique designs, layouts, and water play elements, giving every family a chance to find a splash pad that fits their style.
To make the most of your visit, arrive prepared. Bring essentials like sunscreen, water shoes, snacks, and plenty of hydration to keep everyone comfortable in the desert heat.
Many splash pads also use recycled water systems, making them an eco-friendly and responsible choice for the community.
Be sure to explore all the great options throughout the valley—and don’t forget to share your favorite splash pads online to help other local families discover the best spots.
Enjoy free, local, family-friendly fun while staying cool, safe, and refreshed all season long.
FAQ
What should visitors bring to a water play area?
Guests should pack water bottles, sunscreen, hats, and towels. Water shoes and a change of dry clothes also improve comfort and safety during the outing.
When is the ideal time to visit these cooling zones?
Mornings or late afternoons are recommended to avoid peak heat. Checking local hours ensures the area is open and less crowded for a more enjoyable experience.
Are these facilities free to use?
Most are free and open to the public. Some locations may have specific operating hours or seasonal availability, so verifying details beforehand is advised.
How do these spots handle water safety and conservation?
They use recirculating water systems to conserve resources. Features are designed with safety in mind, including non-slip surfaces and gentle water flow for younger children.
Can adults accompany children into the play areas?
Yes, guardians are encouraged to supervise closely. These spaces are family-friendly, allowing adults to stay nearby to ensure everyone stays safe and has fun.
What makes these destinations suitable for hot weather?
They provide a refreshing escape from high temperatures. The interactive water features offer cooling relief while encouraging active, outdoor play during warm months.
Plan your next sunny day adventure at the best splash pads in las vegas and make unforgettable memories with your family!
A well-designed front yard can raise a home’s value by up to 12%, says the National Association of Realtors—showing how essential a strong landscape design build plan is. This guide will show you how to turn your outdoor space into a beautiful, welcoming area.
By using this guide, homeowners can make their front yard look amazing. It will not only make their home look better but also increase its value.
The Fundamentals of Front Yard Design
The front yard landscape design build is key to making a great first impression. It can make a home look more inviting and attractive. This is important for both potential buyers and visitors.
The Impact of Curb Appeal on Home Value
Curb appeal greatly affects a home’s value. Homes with nice front yards tend to sell faster and for more money. This is because they look better and more welcoming.
Key Elements of Successful Front Yard Design
Good front yard design includes balance, proportion, focal points, and visual flow. These elements work together to create a beautiful space.
Balance and Proportion
A balanced design means no one thing takes over. It creates a peaceful look that’s pleasing to the eye.
Focal Points and Visual Flow
Focal points, like a standout piece or a beautiful garden, draw the eye. They help create a path for the viewer to follow, enhancing the yard’s look.
Design Element
Description
Impact on Curb Appeal
Balance
Harmonious arrangement of elements
High
Focal Points
Attracts the viewer’s eye
Medium
Visual Flow
Guides the viewer’s eye through the yard
High
By using these elements, homeowners can make their front yard more appealing. It becomes a welcoming outdoor space that adds value to their home.
Assessing Your Current Landscape
Understanding your current landscape’s strengths and weaknesses is key for a good landscape design build. This first step is crucial for a successful project.
Evaluating Existing Features and Plants
Start by looking at your current landscape features, like plants, trees, and hardscaping. Think about their condition, how well they work, and how they look. Make a list of what you want to keep, replace, or get rid of.
Check the health and strength of your plants.
Look at how well your hardscaping works.
Find out which features don’t serve their purpose anymore.
Identifying Problem Areas and Opportunities
Then, find areas that need bettering or offer chances to get better. This might include spots that are not used well or things that make your landscape look bad.
Think about these points:
Places with bad drainage or soil erosion.
Spaces that could be used better.
Chances to add new features or tech.
Analyzing Soil and Drainage Conditions
Soil quality and drainage are very important for a good Landscape Design Build. Look at your soil type, how it drains, and how it helps plants grow.
By carefully checking your current landscape, you can make a better Landscape Design Build plan. This plan will meet your needs and make your outdoor space better.
Setting Goals and Budget for Your Project
Setting clear goals and a realistic budget is key for a successful landscaping project. This step makes sure your project is well-planned and can be done.
Defining Your Landscape Objectives
Identifying what you want from your landscaping project is the first step. Do you want to boost curb appeal, create an outdoor living area, or make your space more functional? Knowing your goals helps shape the design and how it’s done.
Creating a Realistic Budget Framework
It’s important to have a budget that makes sense for your landscaping. Think about the cost of materials, labor, and any permits you might need. A good budget keeps your project on track and avoids going over budget.
Planning for Phased Implementation
Breaking your project into smaller stages can make it easier to manage. This way, you can budget better and avoid feeling overwhelmed by a big project.
By setting clear goals, making a budget, and planning in stages, you can have a successful and easy landscaping project.
The Complete Landscape Design Build Process
The landscape design build process is a detailed way to change outdoor areas. It covers many steps, from the first meeting to the final setup. This ensures a landscape that looks good and works well.
Initial Consultation and Site Analysis
The first step is the initial consultation. Here, experts check the site and talk about what the client wants. They look at the soil, drainage, and what’s already there.
Concept Development and Refinement
After checking the site, the next step is making a design. This design is based on what the client needs and the site’s features. The design is then improved based on feedback until it’s just right.
Construction Documentation
When the design is set, the next step is making detailed plans. This includes what materials to use, how much, and when to do it.
Implementation and Quality Control
The last step is making the design real. This means following the plans, putting in the landscaping, and checking the quality. It’s all about making sure it’s done right.
Stage
Description
Key Activities
Initial Consultation
Assessing the site and discussing client objectives
Site analysis, client interviews
Concept Development
Creating a preliminary design and refining it
Design creation, feedback, revisions
Construction Documentation
Creating detailed plans and specifications
Plan drawing, material specification
Implementation
Executing the construction plans and ensuring quality
Construction, installation, quality control
Knowing the whole landscape design build process helps homeowners. It makes sure their outdoor spaces are both beautiful and useful.
How to Design a Front Yard Landscape
Designing a front yard landscape is a fun process. It starts with understanding your outdoor space’s dimensions and layout. This step is crucial to turn an ordinary yard into something special.
Measuring and Mapping Your Space
First, measure your front yard’s size, including any features like trees or gardens. Then, make a detailed map of your space. This helps you see your design ideas clearly.
Creating Functional Zones
Split your front yard into different zones for better use. These zones can be for entrance areas, walkways, and privacy screens.
Entrance Areas and Walkways
Make your entrance welcoming with a nice pathway, lights, and plants. Walkways should be safe, lit well, and easy to walk on.
Privacy Screens and Boundaries
Use screens and boundaries to set your space apart. You can choose from fences, hedges, or plants to create privacy.
Developing a Cohesive Style
To look good together, pick a design theme that matches your home and surroundings. Use materials, colors, and plants that fit this theme. This way, your front yard will look beautiful and cohesive.
Selecting the Right Plants for Visual Impact
Choosing plants that do well in your area is key for a beautiful front yard. The right plants can make your yard look great, improve curb appeal, and even raise your home’s value.
Choosing Climate-Appropriate Plants
When picking plants, think about your local climate and soil. Climate-appropriate plants need less care, fight off pests and diseases well, and grow strong with little help. This saves water, cuts down on fertilizers and pesticides, and makes your yard sustainable.
Creating Year-Round Visual Interest
To keep your yard interesting all year, pick plants that change with the seasons. For example, choose plants with bright spring flowers, lush summer leaves, beautiful autumn colors, or interesting winter shapes. This way, your yard stays engaging all year.
Layering Plants for Depth and Dimension
Using different plants at different heights adds depth and interest to your yard. This means mixing plants of different sizes, textures, and colors to make a beautiful scene.
Trees as Anchors
Trees are like anchors in your yard, giving it height and structure. They help make your yard look mature and stable, even if it’s new.
Shrubs as Structure
Shrubs help with structure and can make borders, hedges, or ground cover. They come in many shapes, sizes, and textures, making them great for any yard design.
Perennials and Annuals for Color
Perennials and annuals add color and life to your yard. Perennials come back every year, while annuals let you change up colors and textures with the seasons.
Plant Type
Characteristics
Benefits
Trees
Height, structure, shade
Anchors the landscape, provides shade
Shrubs
Varied shapes, sizes, textures
Adds structure, can be used for borders or hedges
Perennials
Recurring blooms, varied textures
Provides color, returns year after year
Annuals
Seasonal color, flexible
Allows for seasonal changes, adds vibrancy
By picking and layering different plants carefully, homeowners can make a beautiful and lasting yard. This yard will not only look great but also be good for the environment, making your home more appealing and enjoyable all year.
Essential Hardscaping Elements for Front Yards
A well-designed front yard has many hardscaping elements. These elements make your home look good and work better.
Designing Welcoming Walkways and Pathways
Walkways and pathways are key. They help visitors move through your front yard. Use materials like brick, stone, or concrete for a strong and nice path.
Driveway Materials and Border Options
The driveway material affects your home’s look. You can choose asphalt, concrete, or pavers. Adding plants or decorations around your driveway makes it look even better.
Incorporating Decorative Features and Focal Points
Decorative features and focal points make your front yard interesting. Think about adding water features, lighting, and garden art for a special and welcoming space.
Water Features
Water features, like fountains or small ponds, make your front yard peaceful and calming.
Lighting Design
Good lighting shows off your home’s best parts and keeps it safe. Use pathway lights, spotlights, and ambient lights for a cozy and inviting atmosphere.
Garden Art and Structures
Garden art and structures, like sculptures or arbors, give your front yard personality and charm.
Sustainable Practices in Landscape Design Build
Transforming front yards into eco-friendly spaces is now possible. This change not only helps the environment but also makes homes look better and more valuable.
Water Conservation Strategies
Water conservation is a big part of sustainable landscaping. Using rainwater and drought-resistant plants cuts down on water use. Efficient irrigation systems also help save water.
Using Native and Adaptive Plants
Native and adaptive plants fit well in local climates. They need less care and water, which is good for the environment. They also support local wildlife.
Eco-Friendly Materials and Construction Methods
Choosing eco-friendly materials for hardscaping, like recycled concrete, is better for the planet. Using methods that don’t harm the soil or wildlife is also important.
Rain Gardens and Bioswales
Rain gardens and bioswales manage stormwater runoff in a smart way. They help drainage systems and create homes for wildlife. This makes landscapes more sustainable.
What Do Landscape Architects Design?
Landscape architects mix creativity with technical skills to change outdoor spaces. They work on everything from small gardens to big parks and corporate areas.
The Scope of Professional Landscape Design
They handle every design step, from the first meeting to the final build. They check the site, understand what you need, and make designs that look good and work well.
When to Hire a Landscape Architect
Think about hiring one for big outdoor changes or new projects. They help with rules, make sure it’s green, and boost your property’s worth.
Project Type
Benefits of Hiring a Landscape Architect
Residential Garden Design
Custom outdoor spaces, better look
Public Park Development
Green design, community fun, places to play
Corporate Landscaping
Good image, happy workers, green benefits
Collaborating with Landscape Professionals
Working well with them means sharing your goals and what you want. Talk about your budget, what you hope to get, and any special needs.
Understanding Design Fees and Services
They charge based on the project’s size and detail. Fees can be by the hour, a flat rate, or a percentage of the cost. Knowing what you get for the money is key to avoiding surprises.
Knowing what landscape architects do helps make better choices for outdoor spaces. Whether it’s a small garden or a big park, their design makes any area better.
Step-by-Step Front Yard Construction Guide
Turning your front yard into a stunning outdoor area takes careful steps. A good project needs solid planning, precise work, and knowing the process well.
Site Preparation and Grading
The first step is preparing and grading the site. This makes sure the ground is even and ready for the next steps.
Removing Existing Elements
The first task is to remove old plants, debris, or unwanted structures. This makes room for new things and avoids problems during building.
Soil Preparation
After clearing, it’s time to prepare the soil. This means testing the soil’s type, pH, and nutrients. Based on the test, you can add things to make the soil better for plants.
Installing Hardscape Features
With the site ready, it’s time to add hardscape features like walkways, patios, and driveways. These not only look good but also create useful outdoor spaces.
Planting Implementation
Planting is key in front yard construction. You need to pick the right plants for your climate, soil, and look. Planting correctly helps plants grow well in their new home.
Irrigation System Installation
An effective irrigation system is vital for plant health. It’s designed to water plants at their roots, saving water and ensuring they get enough moisture.
Final Touches and Cleanup
The last step is adding the final touches and cleaning up. This includes mulching, pruning, and checking everything to make sure it’s perfect.
By following these steps, homeowners can create a beautiful front yard. It will make their home look better and offer a welcoming outdoor space.
Maintaining Your New Front Yard Landscape
Keeping your new front yard landscape looking great is important. It needs regular care to stay beautiful and functional.
Seasonal Maintenance Schedule
Having a seasonal maintenance plan is key. It keeps your landscape healthy and lively all year. Tasks include:
Spring: Cleaning up debris, pruning plants, and applying fertilizer.
Summer: Watering regularly, mowing the lawn, and controlling weeds.
Autumn: Leaf cleanup, preparing plants for winter, and dividing perennials.
Winter: Protecting plants from frost, maintaining irrigation systems, and planning for the upcoming season.
Watering and Fertilizing Guidelines
Watering and fertilizing are vital for plant health. Deep watering helps plants grow strong roots. Fertilizing should match the needs of your plants.
Pruning and Plant Care
Pruning keeps plants looking good and growing well. Check your plants often for disease or pests. Act quickly if you find any.
Long-term Renewal Strategies
For a lasting beautiful landscape, plan for the future. You might replace old plants or update your hardscaping. This keeps your landscape fresh and in style.
Conclusion
A well-designed front yard is more than beauty; it shows your home’s personality and style. The process helps homeowners create a beautiful outdoor space. This space boosts your property’s curb appeal and value.
By following this guide, you can turn your front yard into a welcoming area. It should match your home’s architecture. Good front yard landscaping needs planning, creativity, and detail. This results in a space that looks great and is good for the environment.
When starting your landscape design-build company near me project, think about your climate, soil, and upkeep needs. This ensures your landscape thrives for a long time. With the right steps, your front yard will be a beautiful showcase for your home. It will impress everyone who sees it.
Ready to bring your dream front yard to life? Contact Taylormade Landscape, your trusted landscape company, and let’s transform your outdoor space today!
FAQ
What is the importance of curb appeal in front yard landscaping?
Curb appeal greatly affects your home’s value. A well-designed front yard is key for those selling or improving their property.
How do I assess my current landscape for a landscaping project?
Start by looking at what you already have. Check your plants and features. Find out what needs fixing and test your soil and drainage. This helps plan a successful project.
What are the key elements of successful front yard design?
Good design balances everything. It has proportion, focal points, and flow. These elements make your outdoor space welcoming and attractive.
How do I set a realistic budget for my landscaping project?
First, know what you want to achieve. Then, estimate costs and plan in stages. This way, you can manage your budget effectively.
What is the Landscape Design Build process?
It starts with a consultation and moves to concept development. Then, there’s construction documentation and implementation. It’s a full-service approach to landscaping.
How do I design my own landscaping?
Begin by measuring and mapping your yard. Create zones for function and style. This will help you design a beautiful and useful outdoor space.
What do landscape architects design?
They work on many outdoor spaces. This includes homes, parks, and commercial areas. They focus on looks and function.
How do I maintain my new front yard landscape?
Keep up with your yard with a seasonal plan. Water and fertilize right, prune regularly, and renew your space over time. This keeps it looking great.
What are sustainable practices in landscape design?
Sustainable design saves water and uses local plants. It also includes eco-friendly materials and features like rain gardens. These steps reduce environmental harm.
When should I hire a landscape architect?
Hire one for big projects or to follow local rules. They offer expert advice on design and how to bring it to life.
Creating Outdoor Living Spaces with Pool and Fireplace for Cozy Evenings
Remember the crisp chill of an evening? The way the air feels clean and sharp? Now, imagine stepping outside into your own personal outdoor living space. A place where the warmth of a crackling fire meets the serene beauty of water.
This is the dream we can help you build. We believe your home should be a retreat for every season. Transforming your backyard into a functional, year-round escape is more than a project. It’s about creating memories. A well-designed outdoor living space combines luxury outdoor living spaces with comfort, making cool months something to look forward to.
Thoughtful planning is key to blending a pool and fireplace. These elements must work in harmony. The goal is an environment that feels inviting, no matter the weather. This approach turns a simple yard into a true extension of your home.
We will guide you through design principles and practical steps. Our focus is on balancing beauty with purpose. Let’s explore how to make your outdoor living spaces a cozy haven for evenings and beyond.
Inspiring Outdoor Living Spaces
A cozy backyard pool designed by Taylormade Landscapes. A sparkling pool surrounded by lush greenery and comfortable seating areas. Soft lighting casts a cozy ambiance, while clean architectural lines and natural materials create a harmonious, high-end aesthetic. The middle ground features a well-appointed outdoor kitchen, perfect for entertaining on chilly evenings. In the background, a visually striking pergola frames the scene, blending seamlessly with the home’s exterior. This image captures the essence of an expertly crafted, luxurious outdoor living space.
Professional designers approach backyard transformations with strategic planning. They focus on creating environments that serve multiple purposes throughout the year.
Design Tips from Experts
Successful projects begin with understanding your lifestyle needs. Expert designers emphasize creating a clear vision before starting any work.
They recommend dividing your area into distinct zones for different activities. This approach maximizes functionality and creates natural flow patterns.
Real-Life Transformations
Quality upgrades can deliver impressive financial returns. Fixed features like fireplaces and water fixtures may add up to 80% in value.
Major investments such as pools and cooking areas can achieve 200% ROI in warmer regions. These projects often incorporate layered elements for depth and interest.
The most successful transformations balance permanent structures with flexible options. This allows for seasonal adjustments while maintaining core functionality.
Designing Your Dream Backyard
Creating your ideal personal oasis requires thoughtful consideration of how different zones will interact. We focus on developing a cohesive plan that maximizes both beauty and function.
Selecting the Perfect Layout
The right backyard design begins with understanding your property’s natural features. We assess topography, sun patterns, and existing elements to create a harmonious arrangement.
Proper layout ensures smooth movement between activity areas. This prevents bottlenecks while maintaining visual connections throughout the space.
Incorporating Multi-Level Options
Multi-level designs transform flat properties into dynamic environments. Different elevations create natural separations between functional zones.
Rustic metal steps or natural stone transitions connect each level elegantly. This approach maximizes usable area while adding architectural interest to your backyard.
Layout Approach
Best For
Key Benefits
Considerations
Single Level
Flat properties
Easy accessibility
Limited zone separation
Multi-Level
Sloped yards
Natural drainage
Requires steps/transitions
Circular Flow
Entertainment focus
Continuous movement
Needs ample space
Linear Design
Narrow properties
Maximizes length
Can feel restrictive
Each layout option offers unique advantages for different property types. The choice depends on your specific needs and the natural characteristics of your area.
Transforming Your Backyard with Pool and Fireplace
A cozy backyard oasis with a shimmering pool and a crackling fireplace, framed by lush greenery and warm lighting. The Taylormade Landscapes design features a seamless transition from the house to the outdoor living space, with a well-appointed patio area perfect for gatherings on cool evenings. In the foreground, the elegant pool is surrounded by natural stone pavers, while a raised firepit with a wooden pergola creates a inviting focal point. Towering trees and shrubs in the background provide a sense of privacy and seclusion, completing the serene and sophisticated backyard transformation.
The combination of fire and water creates a dynamic backyard experience that transforms with the seasons. We design these elements to work together, creating a versatile entertainment hub. This approach maximizes your investment throughout the entire year.
Strategic positioning is crucial for balancing the pool and fireplace areas. We place them at a safe distance while maintaining visual connection. This creates distinct zones that feel cohesive rather than separated.
Varied seating options accommodate different activities in your living space. Dining tables, bar stools, and lounge chairs serve multiple purposes. This flexibility makes the area perfect for both summer swimming and autumn gatherings.
Material selection ensures consistency throughout your backyard. We choose options that work well in both wet and dry environments. This creates a unified look while accommodating different functional requirements.
The fireplace often serves as a stunning focal point in the living space. It can provide structural support for overhead beams that define the area. This creates a ceiling-like effect that enhances the overall ambiance.
Mastering Outdoor Spaces: Essentials and Tips
Masterful outdoor living oasis, captured in a serene moment. A tranquil pool reflects the warm glow of a crackling fireplace, surrounded by lush foliage and inviting seating areas. Taylormade Landscapes’ skilled design blends natural elements with modern outdoor living spaces amenities, creating a cozy retreat. Soft lighting accentuates the textures of weathered wood, plush fabrics, and smooth stonework. Capture the essence of comfort and style in this picturesque scene, ready to inspire ideas for crafting the ultimate outdoor living space.
Building a remarkable retreat starts with a solid grasp of the core principles. We focus on the fundamental components that create a functional and inviting area, no matter your budget.
Comfortable seating, adequate shade, and proper lighting are non-negotiable. These features extend usability across different weather conditions, making your investment worthwhile year-round.
A key design essential is creating defined zones for specific activities. This approach organizes the area while maintaining a natural visual flow. Think of separate spots for dining, lounging, and conversation.
Mastering your environment means choosing weatherproof materials and comfortable furnishings. Strategic placement of these elements maximizes functionality and invites extended use. Layers of comfort are crucial, from durable hardscaping to personalized decorative touches.
We always recommend starting with core infrastructure. Proper drainage, electrical access, and durable surfaces form the foundation. Decorative elements come later, built upon this reliable base.
Essential tips include planning for all seasons and investing in quality, low-maintenance materials. The most successful designs balance practical needs with aesthetic desires. Every component should serve a purpose while contributing to the overall vision.
Budget-Friendly Upgrades for Your Outdoor Living Space
A stunning backyard doesn’t have to drain your savings account. We focus on high-impact changes that make a big difference. This approach is a smart way to enhance your property without a full renovation.
You can achieve remarkable results with simple ideas. Consider interlocking deck tiles to refresh a tired patio surface. This is a fraction of the cost of a new deck build.
Defined pathways are another excellent upgrade. Use gravel or stepping stones to guide movement through your garden. This adds structure and visual appeal to the entire space.
Lighting is one of the most transformative elements. Solar-powered fixtures create ambiance for evening use. They provide illumination without adding to your electricity bill.
We recommend starting with upgrades that increase how you use the area. An outdoor rug can instantly define a seating zone. Painting old furniture gives it a fresh, new look for minimal cost.
Upgrade Idea
Cost Level
Key Benefit
Estimated Impact
Deck Tiles
Low
Instant surface renewal
High
Pathway Materials
Low-Medium
Defines flow and structure
Medium-High
Solar Lighting
Low
Extends evening use
High
Outdoor Rugs & Paint
Low
Adds color and comfort
Medium
Repurposing items is a fantastic way to stretch your budget. Apply a weatherproof sealant to indoor wooden chairs. Use outdoor fabric to recover cushion covers for a custom look.
The key is to prioritize changes that boost functionality. Every dollar should improve your comfort and enjoyment. This strategic approach ensures your investment pays off every time you step outside.
Creative Themes and Color Schemes
Your backyard’s personality comes alive through creative themes and a thoughtful color palette. We help you choose a style that reflects your taste, from beach vibes to modern minimalism. This foundation ensures every element works together harmoniously.
Bold Color Accents
Color behaves differently outside than inside your home. Earth tones that feel sophisticated indoors often disappear against natural greens and browns. Bold blues, reds, and yellows create playful focal points that stand out beautifully.
Bright Adirondack chairs or vibrant throw pillows inject personality without permanent changes. These accents complement nature rather than competing with it. They add an element of fun that energizes your entire area.
Color Scheme
Best For
Mood Created
Key Accent Colors
Coastal
Relaxation zones
Calm and serene
Soft blues, sandy neutrals
Modern
Entertainment areas
Clean and sophisticated
Black, white, bold primary colors
Rustic
Natural settings
Warm and inviting
Earthy reds, forest greens
Bohemian
Eclectic spaces
Playful and creative
Mixed patterns, vibrant jewel tones
Establishing a Cohesive Look
A well-planned color scheme ties together all your design elements. We recommend carrying your chosen theme through furniture, cushions, and accessories. This creates visual harmony that feels intentional.
Use color strategically to define different zones within your space. Cooler tones work well for relaxation areas. Warmer colors suit entertainment and dining spaces perfectly.
The beauty of color in your design is its flexibility. Seasonal changes through pillows and accessories refresh the look easily. This approach keeps your beautiful outdoor living spaces feeling current without major investment.
Enhancing Ambiance with Outdoor Lighting
As daylight fades, your backyard can transform into a magical evening escape with the right illumination. We focus on creating a layered lighting plan that extends usability and enhances safety. This approach turns a simple area into an enchanting retreat after sunset.
Layered Lighting Techniques
Effective lighting combines different sources for depth and function. Overhead pendants define dining zones, while pathway lights ensure safe movement. Accent lights highlight features like trees or architectural details.
This layering creates distinct moods throughout your property. It guides guests naturally from one area to another. The result is a cohesive and inviting atmosphere after dark.
Solar-Powered Solutions
Solar-powered options offer brilliant light without wiring or energy costs. Woven pendants can provide warm illumination for hours. They are perfect for summer dinners and evening gatherings.
We also recommend strategic placement for dramatic effect. Uplighting against a wall creates visual interest. Downward-facing fixtures produce a softer, more intimate glow for seating areas.
Good lighting serves a dual purpose. It prevents accidents by illuminating walkways. More importantly, it creates an ambiance that makes people want to stay and enjoy the night.
Expanding Functionality with Outdoor Kitchens
Imagine preparing entire meals while staying connected with guests in your backyard retreat. An outdoor kitchen brings the heart of your home outside, creating a natural gathering spot. This addition transforms your property into a complete entertainment destination.
Designing a Practical Layout
We focus on creating efficient workflows in your cooking area. The grill serves as the central element in any functional setup. We position storage near preparation zones for maximum convenience.
Cooking equipment stays centrally located for easy access. Serving areas connect directly to dining spaces. This logical arrangement mimics indoor kitchen efficiency perfectly.
Must-Have Appliances and Features
Essential components include weather-resistant cabinetry and durable countertops. A refrigerator and sink complete the basic kitchen setup. Specialized equipment like pizza ovens add unique cooking options.
Proper lighting ensures evening cooking safety and atmosphere. Adequate ventilation maintains comfort around grilling stations. Bar seating creates interactive spaces where guests can socialize.
This investment provides both personal enjoyment and increased property value. Everything remains accessible without indoor trips. Your cooking area becomes the highlight of outdoor living spaces.
Curating Comfortable Outdoor Seating
The arrangement of your seating defines the social experience of your backyard. We design seating areas to encourage conversation and relaxation, not just provide places to sit. This turns a simple patio into a true extension of your home’s comfort.
We avoid lining all furniture against walls. Instead, we create intimate groupings where people face each other. This fosters natural interaction and makes guests feel connected.
Your furniture should match how you plan to use the space. A deep lounge chair is perfect for reading. A chat set works well around a fire pit for cozy talks.
We recommend establishing multiple zones for different activities. Place a dining set near the kitchen for easy meals. Create a relaxed seating area closer to the pool or fireplace.
Seating Type
Ideal Height
Best Use
Key Feature
Chat Set
Low to Ground
Intimate Conversations
Promotes relaxed, casual atmosphere
Dining Set
Standard Table Height
Meals & Group Dining
Functional for eating and socializing
Bar Stools
Counter Height
Kitchen Interaction
Creates a social, interactive spot
Lounge Chair
Variable/Reclining
Solitary Relaxation
Focus on personal comfort and lounging
Quality is crucial for lasting comfort. Choose frames made from teak or powder-coated metal. Look for plush cushions with water-repellent fabrics.
Thoughtful curation also means considering traffic flow. People should move easily without disturbing seated guests. This balance makes your seating area both functional and inviting.
Adding Natural Elements: Greenery and Trees
Strategic plant selection can dramatically alter the atmosphere and functionality of your garden areas. We focus on choosing greenery that serves both aesthetic and practical purposes throughout your property.
Selecting the Right Plants
Choosing appropriate plants means considering your climate and specific locations. We recommend native species like wildflowers and grasses that adapt naturally to local conditions.
These plants require less water and maintenance while supporting local ecosystems. For poolside areas, drought-tolerant succulents and aloes thrive with minimal care.
Low-maintenance options like boxwoods and agaves create natural borders. They define spaces without demanding constant attention from homeowners.
Creating Natural Privacy
Layering fast-growing trees with shrub borders screens unwanted views effectively. This approach maintains attractive sight lines to desirable vistas within your property.
Trees like maples and oaks provide cooling shade and vertical interest. They establish privacy screens perfect for pool areas where seclusion enhances comfort.
Flowering trees such as cherry blossoms add seasonal color. Mixing textures and heights creates depth while serving practical purposes like wind reduction.
Integrating Water Features for Tranquility
The gentle murmur of flowing water introduces a new dimension of tranquility to any backyard design. Moving water creates one of nature’s most relaxing sounds. This auditory experience masks urban noise and establishes a spa-like atmosphere.
We recommend various water feature options to suit different preferences and budgets. Simple wall-mounted fountains provide an elegant focal point without extensive installation. More elaborate choices include cascading waterfalls and decorative koi ponds.
Koi ponds have gained popularity for their transformative effect. The colorful fish add movement and visual interest. They create an exotic garden setting that feels worlds away from daily life.
For homeowners seeking lower maintenance solutions, pondless waterfalls offer excellent benefits. They deliver the beauty and sound of flowing water without pond upkeep. These features eliminate concerns about standing water and mosquitoes.
Strategic placement maximizes the impact of water elements. Position them near seating areas to enhance the sensory experience. Water features complement fire elements beautifully, creating balanced environments.
Where fire provides warmth and gathering energy, water adds cooling tranquility. This combination creates a harmonious outdoor living space that engages multiple senses. The result is a truly immersive retreat.
Innovative Structures: Pergolas, Gazebos, and More
Architectural structures transform basic yards into purposeful destinations with clear definition and character. We use these elements to create zones that serve specific functions while enhancing visual appeal.
A pergola makes dining areas cozier for guests while providing welcome shade on sunny days. These structures support climbing plants and offer framework for hanging lights that extend evening use.
Choosing Low-Maintenance Materials
We often select vinyl or aluminum for structural elements. These materials last longer and require minimal upkeep compared to traditional wood options.
This approach lets you enjoy your investment rather than constantly maintaining it. Low-maintenance choices work well with existing deck surfaces and other hardscaping.
Enhancing Architectural Appeal
Structures should complement your home’s existing style while adding visual interest. Gazebos function as small rooms perfect for relaxation or intimate conversations.
Each addition serves practical purposes like providing shade and defining space. They also increase property value by making areas more intentional and inviting.
Pergolas create a sense of enclosure while remaining open to sunlight. This versatility makes them popular for defining outdoor living spaces with architectural flair.
Bringing Warmth with Fire Pits and Heaters
The transition from summer to cooler months doesn’t have to mean abandoning your favorite patio spots for indoor confinement. We focus on heating solutions that extend your enjoyment throughout the year. These options transform your areas into cozy retreats even when temperatures drop.
Proper installation ensures both comfort and security in your outdoor living spaces. We recommend consulting local fire codes before beginning any project.
Ensuring Safety and Efficiency
Safety begins with proper clearances from structures and overhanging trees. Maintain adequate seating distance for comfort without excessive heat exposure. This approach protects both people and property.
Stack fire pit blocks at least 12 inches high for proper containment. Fit them snugly together for stability. Steel fire rings and fire bricks add durability to your construction.
Extending Outdoor Use in Cooler Weather
Heating elements transform patio areas from seasonal luxuries to year-round assets. Freestanding units offer flexible placement options. Wall-mounted versions save valuable floor space.
Suspended heaters provide overhead warmth without occupying ground area. This extends seasonality even when autumn temperatures arrive. Your home’s exterior becomes usable regardless of weather changes.
Heater Type
Best For
Key Features
Installation
Freestanding
Flexible patio areas
Portable, wide heat coverage
No permanent installation needed
Tabletop
Intimate dining spaces
Compact, focused warmth
Place on stable surfaces
Wall-Mounted
Space-saving solutions
Permanent, directional heat
Professional installation recommended
Suspended
Pergola-covered areas
Overhead warmth, no floor space
Requires overhead support structure
Seamless Indoor-Outdoor Transitions
Blurring the line between your home’s interior and exterior creates a truly unified living experience. We focus on design strategies that make movement between areas feel natural and effortless.
Full-length glass doors and bi-fold systems physically connect indoor rooms with exterior areas. These openings maintain visual continuity even when closed. They transform how you experience your entire house.
Material consistency builds subconscious connections between spaces. Continuing wood tones from your flooring onto the deck creates visual flow. This approach makes both areas feel like parts of one cohesive design.
Color coordination strengthens the relationship between interior and exterior zones. Bold furniture hues used outside can be echoed in indoor accessories. This creates visual threads that tie the whole property together.
Furniture selection plays a crucial role in harmonious transitions. Outdoor pieces should complement your indoor style. This ensures the space feels like an extension of your home rather than a separate entity.
Keeping areas clutter-free enhances the transition experience. Clean, organized spaces make movement feel instinctive. Small details like matching planters create thoughtful connections throughout your living space.
Personalizing Your Outdoor living Space: Furniture and Decor
Furniture and decor selections transform standard areas into unique expressions of your style. We recommend bringing indoor comfort concepts outside through coordinated elements.
Bright artwork and matching pillows create visual harmony. A beverage cart adds both convenience and personality to your setup.
Patterned rugs instantly refresh any area’s appearance. Braided stripes or geometric designs define seating zones beautifully.
Seasonal pillow swaps offer easy updates. Bamboo chairs with white cushions gain new life with playful patterns.
Durability matters for items exposed to weather. Invest in weatherproof furniture that withstands elements without deterioration.
Furniture Type
Best Placement
Personalization Tip
Durability Factor
Dining Table
Entertainment Zones
Centerpiece for gatherings
Powder-coated metal
Lounge Chairs
Relaxation Areas
Custom cushion colors
Teak or synthetic wicker
Accent Tables
Throughout Space
Seasonal decor displays
Weather-resistant finishes
Conversation Sets
Fire Feature Views
Coordinated throw pillows
UV-protected fabrics
The right table becomes a central gathering point for people. It frames your view of special features like water elements.
Strategic placement guides attention to your best assets. Real-world examples show how color schemes create cohesive designs.
Thoughtful personalization makes areas feel custom-designed rather than catalog copies. Your choices should reflect what you love most.
Conclusion
When all elements come together thoughtfully, your property becomes more than just a yard—it becomes an extension of your home. We’ve shown how combining pools and fireplaces creates versatile outdoor living spaces with pool for year-round enjoyment.
The key lies in balancing beauty with practical function. Every choice, from lighting to seating, should serve both aesthetic and comfort purposes. This approach transforms your investment into daily value.
Real-world examples demonstrate that any budget can achieve remarkable results. The wall between interior and exterior areas continues to blur as homeowners embrace seamless transitions.
Your personalized retreat awaits when you implement these design principles. We believe every property holds potential for creating exceptional outdoor living spaces with pool. Ready to transform your backyard? Contact the best outdoor living spaces contractors near me today and start creating your dream space!
FAQ
How can we design a deck or patio that feels like an extra room?
To create a true extension of your home, define the area with clear zones. A dedicated spot for dining, a separate conversation nook, and a cooking station help organize the space. Using similar colors and materials as your interior design strengthens the connection between inside and outside.
What are some budget-friendly upgrades we can make to our garden?
Simple changes often have the biggest impact. A fresh coat of stain on a deck, colorful throw pillows for seating, and container plants for pops of green are affordable starts. Solar-powered lights are a cost-effective way to add evening charm without wiring.
What should we consider when planning an outdoor kitchen?
Focus on a practical layout first. Place the grill, prep surface, and storage in a compact triangle for efficiency. Choose durable, easy-to-clean materials like stainless steel or stone for countertops. Even a simple setup with a high-quality grill and a small refrigerator can transform your entertaining capabilities.
How do we choose the right plants for our area?
Select greenery that thrives in your local climate to ensure longevity and ease of care. Native species are often low-maintenance and support local wildlife. Consider the plant’s mature size to avoid overcrowding and use taller shrubs or ornamental trees to create natural privacy screens from neighbors.
What lighting techniques work best for evening use?
We suggest a layered approach. Combine ambient lighting from overhead sources like a pergola with string lights, task lighting for grilling or reading, and accent lights to highlight a beautiful tree or water feature. This mix provides both functionality and a magical atmosphere after dark.
Remember that feeling when you pull into your driveway after a long day? Your front yard should welcome you home, not add to your to-do list. With the right landscape maintenance, it’s easy to keep things beautiful without extra stress. We understand how precious your time is, especially during the busy fall season.
Autumn in Texas City brings cooler weather, making it the perfect time to transform your property. This season is ideal for planting and design work because plants establish roots easily. You can create a beautiful space that requires less ongoing care.
We believe your yard should bring joy, not constant chores. Our team specializes in creating stunning, easy-care outdoor spaces. We use native plants and smart designs to reduce mowing, trimming, and weeding.
This article shares practical ideas to enhance your curb appeal while saving time. We’ll show you how to achieve the best lawn with minimal effort. Let us help you create a yard that looks great all season long.
Why Fall is the Perfect Time for Landscape
Autumn brings a special opportunity for your outdoor space. The changing season creates ideal conditions for establishing healthy growth. Many homeowners miss this crucial window for yard care.
Optimal Planting Conditions in Texas Autumn
Texas autumn offers mild temperatures and regular rainfall. These conditions help new plants establish without constant watering. The soil stays warm enough for strong root development.
This natural advantage means less work for you. Plants settle in before winter and emerge stronger in spring. Our team knows exactly what thrives in Texas City’s unique climate.
Preparing Your Lawn for Winter Resilience
Fall care builds strength for the colder months. We recommend aeration and nitrogen-rich fertilization. This strengthens grass roots against frost and cold weather.
Adjusting mowing heights protects grass crowns during winter. Proper fall care ensures your lawn greens up faster in spring. It’s about working smarter, not harder.
How Proper Fall Care Reduces Spring Workload
Investing in autumn care saves significant time later. Thorough cleanup now prevents weed growth and disease in spring. You’ll need less reseeding and weed control next season.
Many Texas City residents overlook these seasonal services. Yet this approach reduces long-term maintenance costs. Our customers enjoy healthier yards with less effort.
We’ve served this area for over ten years. Our fall services include specialized fertilization and cleanup. Let us help you create a beautiful, low-maintenance property.
Schedule your lawn care services today for best results. Proper autumn attention means a vibrant yard all year round.
Native Texas Plants for Effortless Fall Beauty
Imagine stepping outside to a yard that practically takes care of itself. Texas native plants offer this incredible benefit. They’ve adapted to our local climate over centuries.
These plants need less water and fight off pests naturally. You’ll spend less time on yard work and more time enjoying your space. Our team specializes in selecting the perfect natives for your property.
Fall is the ideal season for planting these resilient varieties. The cooler temperatures help them establish strong roots. You’ll see beautiful results with minimal effort.
Drought-Resistant Perennials That Thrive in Texas City
Black-eyed Susan brings cheerful yellow blooms to your autumn yard. This tough plant handles dry spells beautifully. It attracts pollinators while needing very little care.
Texas Sage offers stunning purple flowers and silvery foliage. It thrives in our heat and requires almost no irrigation. These perennials create lasting beauty with minimal input.
Native Grasses That Require Minimal Care
Taylormade Landscape adds wonderful texture and movement. Its blue-green blades turn copper-colored in fall. This grass needs no mowing and very little water. They create spectacular pink plumes in autumn. It dances gracefully in the breeze. These grasses establish quickly and spread naturally.
Using native plants significantly reduces your water bills. You’ll notice fewer weeds and healthier soil. These plants support local birds and beneficial insects too.
Our care services include expert planting and establishment. We ensure each plant gets the right start. This approach guarantees long-term success and beauty.
Every property has unique conditions and opportunities. We provide personalized recommendations for your specific situation. Contact us today for a free quote on transforming your yard.
Let our experienced team handle the planting work. You’ll enjoy a beautiful, low-care landscape that welcomes you home season after season.
Mulching Strategies for Reduced Maintenance
What if you could reduce your watering schedule and weed-pulling sessions with one simple solution? Mulching offers incredible benefits for Texas City properties. This technique creates a protective barrier that works constantly for your yard’s health.
Proper mulching transforms how you care for your outdoor space. It saves time, conserves resources, and enhances beauty. Our team has seen how strategic mulching revolutionizes property care.
Choosing the Right Mulch for Texas Climate
Texas weather demands specific mulch types. Hardwood bark works beautifully in our area. It decomposes slowly while enriching soil naturally.
Inorganic options like gravel offer longevity in sunny conditions. We consider your property’s specific needs when recommending materials. Local availability ensures the best price and quality for our customers.
Some materials perform better in Texas City’s unique climate. Cedar mulch naturally repels insects while retaining moisture. Pine straw provides excellent coverage for sloping areas.
Proper Mulching Techniques to Suppress Weeds
Correct application makes all the difference. We apply a 2-3 inch layer across beds and around trees. This depth blocks sunlight from reaching weed seeds.
Avoiding “volcano mulching” protects tree health. We keep mulch several inches from trunks and stems. This prevents moisture buildup and potential rot issues.
Annual refreshing maintains effectiveness against weeds. Our care services include proper mulch maintenance. You’ll notice significantly fewer weeds over time.
How Mulch Conserves Water and Saves Time
Mulch acts like a protective blanket for soil. It reduces evaporation during Texas’s dry autumn days. This means less frequent watering for your plants and grass.
Water conservation translates directly to time savings. You’ll spend fewer days dragging hoses or adjusting sprinklers. The soil stays moist longer between watering sessions.
Temperature regulation protects plant roots from stress. Mulch insulates against both heat and cold extremes. Healthier plants need less corrective care throughout the seasons.
Proper mulching can reduce your yard work time by up to 50%. This makes it one of our most recommended services. The investment pays off through reduced water bills and less weeding.
Schedule mulching as part of your fall cleanup service. Our team handles the job with expertise and care. You’ll enjoy a healthier, more beautiful property with minimal effort.
Contact us today for a free quote on mulching services. We’ll assess your specific needs and provide the best solution. Transform your yard into an easy-care oasis this season.
Hardscape Elements That Minimize Upkeep
Our team designs hardscapes that match Texas City’s unique climate. We choose materials that handle heat and humidity well. You get lasting beauty with almost no ongoing care.
Pathway Materials That Stay Beautiful Year-Round
Concrete pavers make excellent paths for our area. They resist weathering and need only occasional sweeping. Gravel offers natural drainage and a rustic look.
These materials keep your property accessible in all weather. They won’t fade or decay like some organic options. You save time on repairs and replacements.
Decorative Rocks and Stone Features
River rock brings natural texture without any upkeep. Limestone features add timeless elegance to your space. Both options work beautifully in Texas heat.
Stone elements never need watering or trimming. They maintain their appearance year after year. Our customers love how these features enhance their property.
Incorporating Pavers for Functional Beauty
Paver patios create wonderful outdoor living areas. They’re easy to clean with just occasional washing. These surfaces reduce the amount of grass needing care.
Less lawn means less mowing and fertilization. You gain more usable space for relaxation. Our team installs pavers that complement your home’s style.
Hardscapes improve drainage during rainy seasons. They help prevent soil erosion in your yard. This further reduces your overall maintenance needs.
Combining different materials creates visual interest. We often use native stone with drought-tolerant plants. These designs work particularly well in our climate.
Long-term cost savings make hardscapes a smart choice. You invest once and enjoy years of easy care. The initial price pays off through reduced work and water bills.
Our company specializes in custom hardscape designs. We consider your property’s specific size and needs. Every job receives our full attention to quality.
Contact us today for a free quote on hardscape services. Our experienced team will create a plan that reduces your yard work. Transform your outdoor space into an easy-care oasis.
Professional Landscape Services We Provide
Imagine coming home to a perfectly cared-for yard every single day. Our professional team handles all aspects of outdoor care so you don’t have to. We offer comprehensive services designed specifically for Texas City properties.
Our approach combines expertise with advanced technology for superior results. We understand each property has unique needs and characteristics. That’s why we tailor our services to your specific situation.
Our Comprehensive Fall Cleanup Process
Fall cleanup forms the foundation of healthy seasonal transitions. We begin with thorough leaf removal using specialized equipment. Our team clears all debris from lawns, beds, and hard surfaces.
We carefully prepare planting beds for winter protection. This includes proper grading and soil amendment where needed. Our process prevents winter damage and promotes spring vitality.
Every cleanup job includes gutter clearing and surface washing. We ensure your property looks its best entering the colder months. This comprehensive approach saves you time and protects your investment.
Seasonal Fertilization for Healthy Lawns
Our fertilization program uses hybrid-organic methods for optimal results. We apply nutrients that promote deep root growth and resilience. This approach reduces chemical usage while maximizing effectiveness.
Fall fertilization prepares your grass for winter dormancy. It ensures strong spring green-up and reduces weed competition. Our team times applications perfectly for Texas City’s climate.
We analyze soil conditions before each treatment. This guarantees your lawn receives exactly what it needs. The result is healthier grass that requires less ongoing care.
Expert Shrub and Tree Trimming Techniques
Proper trimming enhances plant health and safety. Our trained team uses professional techniques and equipment. We understand growth patterns and optimal pruning times.
We focus on maintaining natural shapes while removing problem branches. This improves air circulation and light penetration. Our methods reduce disease risk and promote vigorous growth.
Safety is always our top priority during trimming operations. We protect your property while achieving beautiful results. Your plants will look their best and stay healthier longer.
Beyond these core services, we offer complete yard care solutions. Our additional services include mulching, edging, and sod installation. We also provide pressure washing for hardscapes and surfaces.
Our company brings over ten years of local experience. We serve Texas City and throughout Galveston County. Our track record shows consistent customer satisfaction and quality work.
We utilize advanced technology including AI property analysis. This allows us to deliver precise, customized care for each yard. Our maintenance plans offer weekly or bi-weekly service options.
All our work comes with a Done-Right Guarantee. If you’re not satisfied, we’ll re-service or refund your payment. We also protect your property during all jobs.
Recent projects include drainage solutions and complete lawn transformations. These successes demonstrate our expertise and commitment to excellence. We take pride in helping properties reach their full potential.
Getting started is simple through our online booking system. You can receive instant quotes and schedule service at your convenience. Experience the difference professional care makes for your property.
Contact us today for your free quote. Our team is ready to provide the exceptional service your yard deserves. Let us handle the work while you enjoy the results.
Why Texas City Homeowners Choose Our Landscape
Homeowners across Texas City have trusted our team for their outdoor needs since 2013. Our deep understanding of local conditions sets us apart from other companies. We know exactly what works for properties in our area.
Our company has served hundreds of customers throughout Galveston County. We understand the unique soil composition and climate challenges here. This knowledge helps us provide the best care for your grass and plants.
Over a Decade of Local Experience
Ten years of service means we’ve seen every type of yard situation. We know which grasses thrive in Texas City’s specific conditions. Our team recognizes common weed types and how to address them effectively.
We’ve worked in neighborhoods from Buttonwood Drive to Mainland Park. This experience gives us insight into local property styles and needs. You benefit from knowledge gained through thousands of jobs completed.
Our Commitment to Quality and Customer Satisfaction
Quality isn’t just a word we use – it’s our standard for every job. LawnStarter reviews consistently praise our reliability and attention to detail. Customers appreciate our professional crew behavior and thorough cleanups.
We hire only background-checked professionals who share our values. Each team member receives extensive training in proper techniques. This ensures your property receives the best care possible every time.
Serving Residential and Commercial Properties
Our services adapt to any property size or type. We handle small residential yards and large commercial landscapes equally well. The same quality standards apply regardless of job size.
Business properties receive the same careful attention as homes. We understand that curb appeal matters for both residential and commercial spaces. Our flexible scheduling meets the needs of any customer.
Service Type
Residential Benefits
Commercial Benefits
Our Approach
Lawn Mowing
Weekly consistency
Professional appearance
Pattern variation
Fertilization
Healthier grass
Reduced weeds
Seasonal timing
Trimming
Enhanced beauty
Safety compliance
Proper techniques
Weed Removal
Clean appearance
Professional image
Thorough extraction
Cleanup Services
Time savings
Client satisfaction
Complete removal
Our pricing remains competitive while delivering exceptional value. We provide transparent quotes with no hidden fees. Many customers stay with us for years because of consistent quality service.
Communication is easy through multiple channels. We arrive on time and complete work efficiently. Your satisfaction drives everything we do as a company.
Join our growing family of satisfied Texas City customers today. Experience the difference that professional care makes for your property. Contact us for a free quote and see why we’re the area’s preferred choice.
Our Simple Process for Landscape Maintenance
Getting professional lawn care should feel easy and stress-free. We designed our entire system around your convenience and peace of mind. Our streamlined approach eliminates guesswork and delivers reliable results every time.
Homeowners appreciate how simple our process works from start to finish. You can arrange everything online without phone calls or waiting. We handle all the details while you enjoy your beautiful yard.
Getting Your Exact Price Online in Seconds
Our pricing system uses advanced technology for accuracy. Enter your address on our website to receive an instant quote. Satellite imaging and AI analyze your property’s specific needs.
This technology measures your exact yard size and features. The system calculates the cost of landscape maintenance for mowing, trimming, and other services. You see the total price before committing to anything.
We adjust prices in only 2% of cases after property visits. Your first service always honors the quoted price. This transparency builds trust from the very beginning.
Scheduling That Fits Your Timeline
Choose service dates that work with your schedule through our online portal. We offer quick starts often within 48 hours of booking. There are no long-term contracts or hidden fees.
Our calendar shows available time slots in real-time. Select weekly, bi-weekly, or one-time care services. You maintain full control over your lawn care schedule.
Change or skip appointments with one tap in our app. Request different crews if you have preferences. We make yard care fit your life perfectly.
Our Done-Right Guarantee for Peace of Mind
We stand behind every job with our satisfaction guarantee. If service doesn’t meet expectations, we re-mow or refund within five days. Our $2 million property protection policy covers any accidents.
This guarantee means you risk nothing when trying our care services. We prioritize your complete satisfaction with every visit. Our team works extra hard to ensure perfect results.
Service Feature
How It Works
Your Benefit
Our Commitment
Online Pricing
AI property assessment
Transparent costs
Price accuracy
Flexible Scheduling
Real-time calendar
Convenient timing
Quick start options
Quality Guarantee
5-day satisfaction window
Risk-free trial
Re-service promise
Property Protection
$2 million coverage
Complete peace of mind
Accident protection
Customer Control
App management
Schedule changes
Instant updates
Our vetted professionals represent the top 3% of lawn care specialists. They receive extensive training in proper techniques and customer service. You always get quality work from experienced team members.
The entire process protects your privacy and eliminates spam calls. We handle your information securely through encrypted systems. Your comfort and security matter greatly to our company.
Try our easy process today for your Texas City property. Get a free quote online and experience professional care without delay. We make maintaining your best lawn simpler than ever before.
Texas City Lawn Care Facts and Local Expertise
Did you know that understanding local lawn data can transform your yard care approach? We use real Texas City statistics to provide superior service. Our team analyzes local conditions to deliver the best results for your property.
Understanding Local Grass Types and Their Needs
Bermudagrass covers 65% of Texas City lawns. This popular grass needs special fall attention. We lower mowing heights and apply nitrogen-rich fertilization before winter.
Centipedegrass makes up 12% of local yards. It prefers acidic soil and minimal fertilization. Zoysiagrass accounts for 7% of area lawns with its dense growth pattern.
Each grass type requires different care approaches. Our team knows exactly how to treat each variety. We adjust our methods based on your specific grass type.
Seasonal Maintenance Tips for Texas Lawns
Fall brings crucial care opportunities for Texas lawns. Aeration helps grass roots access nutrients and water. Overseeding fills bare spots for a thicker lawn next spring.
Leaf removal prevents grass suffocation and disease spread. We recommend adjusting watering schedules as temperatures drop. These steps ensure your lawn stays healthy through winter.
Only 9% of local lawns receive proper fertilization. Our care services include tailored nutrient applications. This dramatically improves lawn health and appearance.
Average Yard Sizes and Service Expectations
The average Texas City yard measures 9,542 square feet. This size influences our service timelines and pricing. Our teams complete most jobs within two hours.
Standard mowing service costs about $45.61 for an average yard. Cleanup services might include debris removal or mulching. We provide transparent pricing before starting any work.
Most homeowners prefer grass kept at 2-3 inches height. Our equipment delivers precise cuts at your preferred length. We accommodate specific height requests for optimal lawn health.
Service Type
Average Cost
Time Required
Recommended Frequency
Lawn Mowing
$45.61
1-2 hours
Weekly
Fertilization
$60-80
30 minutes
Seasonal
Leaf Removal
$75-100
1-2 hours
Fall Season
Aeration
$80-120
1 hour
Annual
Weed Control
$40-60
30 minutes
Monthly
Texas City enjoys sunshine 11% of the year. This affects watering needs and plant selection. We consider local climate patterns when planning your care schedule.
Our deep local knowledge ensures optimal results for your property. We understand soil composition and seasonal changes. This expertise translates to better lawn health for our customers.
Use this data to make informed decisions about your lawn care. Trust our experience with Texas City’s unique conditions. We deliver quality service that meets your specific needs.
Contact us today for a free quote on professional lawn care. Our team will assess your property and provide customized recommendations. Experience the difference that local expertise makes for your yard.
Conclusion: Transform Your Front Yard This Fall
Your journey to a beautiful, low-maintenance front yard starts this fall. Native plants, smart mulching, and durable hardscapes all work together to save you time—while keeping your home looking its best. And with professional landscapers like us, your yard can thrive with minimal effort.
Fall is the perfect season to boost curb appeal and cut down on next spring’s chores. Our team at Taylormade Landscapes brings trusted Las Vegas local expertise to every project, tailoring our services to your property’s needs and desert climate challenges.
Get your exact price in seconds with our quick online quote tool. Schedule your fall cleanup, fertilization, or maintenance visit today. With our satisfaction guarantee, enhancing your yard is completely risk-free.
Join hundreds of Las Vegas homeowners who enjoy more free time and a yard they’re proud of. Contact Taylormade Landscapes now to start your transformation!
FAQ
What are the best low-maintenance plants for yards?
We recommend native Texas plants like drought-resistant perennials, hardy shrubs, and native grasses. These varieties thrive in our climate with minimal watering and care, making them perfect for busy homeowners.
How does fall care reduce spring workload?
Proper autumn attention strengthens your lawn and plants before winter. This leads to healthier growth in spring, meaning less time spent on repairs, weeding, and fertilization when warmer weather returns.
Do you offer free quotes for your services?
A>Yes, we provide free, no-obligation quotes tailored to your property’s size and needs. You can get an exact price online in seconds or speak with our team for a detailed assessment.
What is included in your fall cleanup service?
Our comprehensive process includes leaf removal, debris clearing, trimming, and fertilization. We focus on preparing your yard for winter while enhancing its health and appearance for the coming seasons.
How often should lawns be mowed in the fall?
We typically suggest continuing regular mowing through autumn, adjusting frequency as growth slows. Keeping grass at an optimal height helps protect roots and discourages weeds.
Can you handle both residential and commercial properties?
Absolutely. We serve homeowners and businesses across the area, tailoring our care to each property’s unique requirements. Our team is equipped to manage yards of all sizes with precision and quality.
Families across the country are discovering a fantastic way to add fun to their outdoor space. More and more homeowners are choosing in-ground trampolines and other sunken recreational equipment for their yards. This trend focuses on safety and creating a beautiful landscape.
These models sit flush with the ground, which dramatically reduces the risk of falls. There is no high frame to climb onto, and the jump surface is much closer to the earth. This design often means you don’t need tall, bulky safety nets.
A proper setup is crucial for safety and long-term enjoyment. It involves careful ground preparation and understanding drainage. This ensures your new centerpiece for family fun remains secure for years.
Our guide will walk you through everything you need to know. We cover the process, important safety measures, and what to expect. We are here to help you get started on creating a wonderful play area for your family.
Benefits of Choosing In-Ground Trampolines for Your Backyard
Today’s families demand outdoor equipment that offers peace of mind while providing endless entertainment for all ages. These sunken recreational features deliver on both fronts with remarkable effectiveness.
Enhanced Safety for Families
The primary advantage lies in dramatically reduced fall risks. By positioning the jump surface at ground level, we eliminate dangerous drops from traditional heights. This design provides exceptional security for children of all ages.
Louise A., a satisfied customer, shares: ‘We have 7 grandchildren, and even the 2-year-olds love it! The trampoline is used more than any other part of our play area.’ Parents appreciate the reduced anxiety knowing their backyard play space is safer.
Long-Term Value and Aesthetic Appeal
These recreational investments offer outstanding durability and visual integration. They blend seamlessly into landscape designs without dominating your outdoor space. The flush installation creates a clean, integrated appearance that maintains property appeal.
Emma P. confirms the lasting value: ‘My husband is a big guy who jumps comfortably. It’s a ‘buy once’ purchase that will last forever.’ The sturdy construction accommodates users of all sizes while preserving the beauty of your backyard environment.
Our Expertise in in-ground trampoline installation near me
We’ve built a nationwide network of qualified professionals dedicated to transforming outdoor spaces with precision and care. Our approach ensures every project meets the highest standards of safety and quality.
Finding the right team for your project is crucial. We connect you with experienced specialists who understand the unique requirements of sunken recreational equipment.
Streamlined Service Process
Our 7-step approach makes getting started simple. First, you complete a detailed project form outlining your specific needs and backyard characteristics.
Next, we review your project together and provide a customized quote. Finally, we schedule the work at your convenience while our professionals handle everything.
This efficient system ensures clear communication from start to finish. You can relax knowing experienced hands are managing your project with expertise.
Understanding the In-Ground Trampoline Installation Process
A systematic approach ensures your outdoor project meets the highest standards of safety and quality. Our methodical process begins with thorough planning and continues through careful execution.
Site Assessment and Preparation Details
Every project starts with a comprehensive site evaluation. Our professionals examine your yard’s characteristics to determine the scope of work needed.
We assess accessibility, ground conditions, and potential underground obstacles. This careful planning prevents surprises during the installation process.
Installation Techniques and Safety Measures
Proper excavation and drainage systems are crucial for long-term stability. Our teams use precise techniques to create a secure foundation.
Safety measures include proper ventilation and anchoring systems. These features ensure your recreational area remains safe for years.
Site Condition
Standard Installation
Custom Solution Required
Level Ground
Straightforward process
Minimal adjustments
Sloped Terrain
Not recommended
Grading and retaining walls
Rocky Soil
Challenging
Specialized equipment needed
Clay-Heavy Ground
Possible with care
Enhanced drainage systems
Customized Solutions for Unique Landscapes
We adapt our approach to match your specific backyard characteristics. Whether dealing with difficult access or unusual soil composition, we find solutions.
Customer Matt M. experienced “the smoothest process” with his installation completed in one day. This efficiency minimizes disruption to your landscape while delivering lasting results.
The foundation of a safe and lasting backyard feature lies in the quality of its components. We partner exclusively with highly-rated trampoline brands known for their commitment to safety and durability. This ensures your family enjoys a premium product built to withstand years of use.
Our service provides everything you need in one convenient package. From selecting the perfect model to coordinating the setup, we streamline the entire process. This eliminates the hassle of sourcing from multiple suppliers.
Partnering with Industry Leaders
We carefully vet all manufacturers. Our partners must demonstrate proven safety testing and compliance with strict ASTM standards. This rigorous selection guarantees peace of mind for every homeowner.
Customer Emma P. noticed the difference immediately, stating, “You can tell that they use high quality material.” This quality is evident in details like rust-resistant galvanized steel frames and UV-protected jump surfaces.
Investing in superior trampolines from reputable trampoline brands is cost-effective over time. It reduces the need for frequent repairs or premature replacement. The initial investment pays off with long-term reliability and enjoyment.
Material Feature
Standard Brand
Our Highly-Rated Brands
Frame Construction
Basic coated steel
Hot-dip galvanized steel
Jump Mat Material
Standard polypropylene
UV-stabilized, reinforced Permatron®
Spring Protection
Thin foam padding
Weather-resistant, thick PVC padding
Warranty Coverage
Limited (1-5 years)
Comprehensive (10+ years)
Customer Experiences and the Value of Professional Service
Hearing directly from homeowners who have transformed their backyards gives us valuable insights into what truly matters. Our approach centers on creating positive experiences from start to finish.
Real Stories from Satisfied Clients
Louise A. shares her experience: “They have the best customer service I have ever had the pleasure to deal with.” This feedback reflects our dedication to each customer.
Matt M. noted “the smoothest process” from purchase to completion. Emma P. appreciated how “they handle everything for you.” These stories demonstrate our comprehensive approach.
Misty G. called our services “absolutely amazing” with excellent customer support. We take pride in these authentic testimonials.
Commitment to Reliable Customer Support
Our customer support partner network ensures consistent assistance throughout your project. We answer questions about scheduling, site requirements, and maintenance.
The support partner installation coordination connects you with local professionals. We maintain oversight to guarantee quality standards.
Support Feature
Standard Service
Our Professional Approach
Pre-project Consultation
Basic information
Detailed site assessment
Installation Coordination
Self-managed
Full project management
Post-installation Support
Limited warranty only
Ongoing maintenance guidance
Response Time for Questions
48+ hours
Same-day responses
We remain available to address any customer questions that arise. Our support extends beyond the initial project completion.
Integrating Landscape Design with Trampoline Installations
Creating a backyard that flows seamlessly requires thoughtful integration of recreational features with your overall landscape design. We approach each project as part of a complete outdoor living space.
Our design process considers how the play area connects to gardens, patios, and other functional zones. This creates a cohesive environment where every element works together.
Customizing Backyards for Maximum Fun
Every family has unique needs for their outdoor space. We offer creative solutions that maximize enjoyment while fitting your specific requirements.
Customer Emma P. shares: “We had the space to do side by side and our kids love jumping back and forth between them.” This approach works beautifully for families with multiple children or frequent playdates.
Multiple setups can create dedicated zones for different age groups. This customization ensures everyone enjoys the space safely.
Harmonizing Aesthetics with Functionality
We carefully position recreational features to complement existing landscape elements. This includes preserving mature trees and maintaining clear sight lines.
Our team works to minimize disruption to surrounding areas during setup. We protect existing plantings and irrigation systems not involved in the project.
Creative landscaping solutions enhance the final result. Decorative borders, ground cover plants, and perimeter seating create a polished look.
These installations consider long-term landscape evolution. We position features to remain functional as family needs change over time.
Safety Measures and Best Practices for Installation
Implementing comprehensive safety measures is essential for creating a worry-free recreational environment for families. Our professionals follow strict protocols from the initial site evaluation through final inspection.
Every project begins with careful assessment of the designated space. We identify potential hazards and structural challenges before starting work.
Ensuring a Secure and Level Installation
A perfectly level foundation is critical for safety and performance. Uneven surfaces can create dangerous bounce patterns and increase injury risks.
Our teams use precise techniques to create stable bases, even on challenging terrain. We verify the area is properly prepared before excavation begins.
Proper depth requirements ensure adequate clearance beneath the jumping surface. Ventilation systems prevent air pressure buildup during use.
Drainage solutions protect against water accumulation that could cause damage. We maintain clear safety zones around the recreational area as recommended.
Regular inspections after completion help maintain safe operating conditions. Our approach adheres to all relevant safety standards and building codes.
Conclusion
The journey to creating your ideal outdoor recreation area begins with a simple decision to prioritize safety and quality. We’ve made this process straightforward by connecting you with experienced professionals who understand in-ground trampoline installations.
Our partner installation services provide everything need in one convenient package. You can sit back and relax while our qualified partners take care of all the technical work. They handle every detail from start to finish.
We’re with you every step of the way, ensuring a smooth experience. Let our partners take care of the complex aspects while you get ready for family fun. The entire setup is designed to be worry-free.
Contact us today to get a FREE estimator to begin your project. Sit back, relax get ready to enjoy your transformed backyard space. Our team will help you get ready for years of safe entertainment. You can also visit our location to meet our local experts today for a safe, seamless, and beautiful backyard setup.
FAQ
What makes an in-ground trampoline a safer choice for my family?
We focus on enhanced safety by creating a lower profile. This design minimizes fall height and integrates the jumping surface into your landscape, reducing risks associated with traditional above-ground models.
How do you ensure a high-quality installation?
Our process begins with a thorough site assessment. Our trusted and licensed installers then use proven techniques to ensure a secure, level fit. We prioritize proper drainage and ventilation for long-term performance.
Which trampoline brands do you work with?
We partner with industry leaders and highly-rated trampoline brands known for their durability and safety features. This allows us to offer reliable products that are built to last in your backyard.
Can you work with sloped or uneven yards?
A> Absolutely. We provide customized solutions for unique landscapes. Our team is skilled in handling various terrains to create a safe and functional installation that works with your property’s specific features.
What kind of customer support can I expect?
We are your dedicated customer support partner from start to finish. Our commitment includes clear communication throughout the service process and being available to answer any questions after the work is complete.
How long does the typical installation take?
Our streamlined service process is efficient. The timeline depends on the project’s complexity, but our professional install partners work diligently to complete the job correctly, allowing you to relax and get ready to jump.
Will the installation damage my existing landscape?
We take great care to harmonize aesthetics with functionality. Our goal is to enhance your backyard, and our installers are careful to minimize disruption, often leaving the area looking better than when we started.